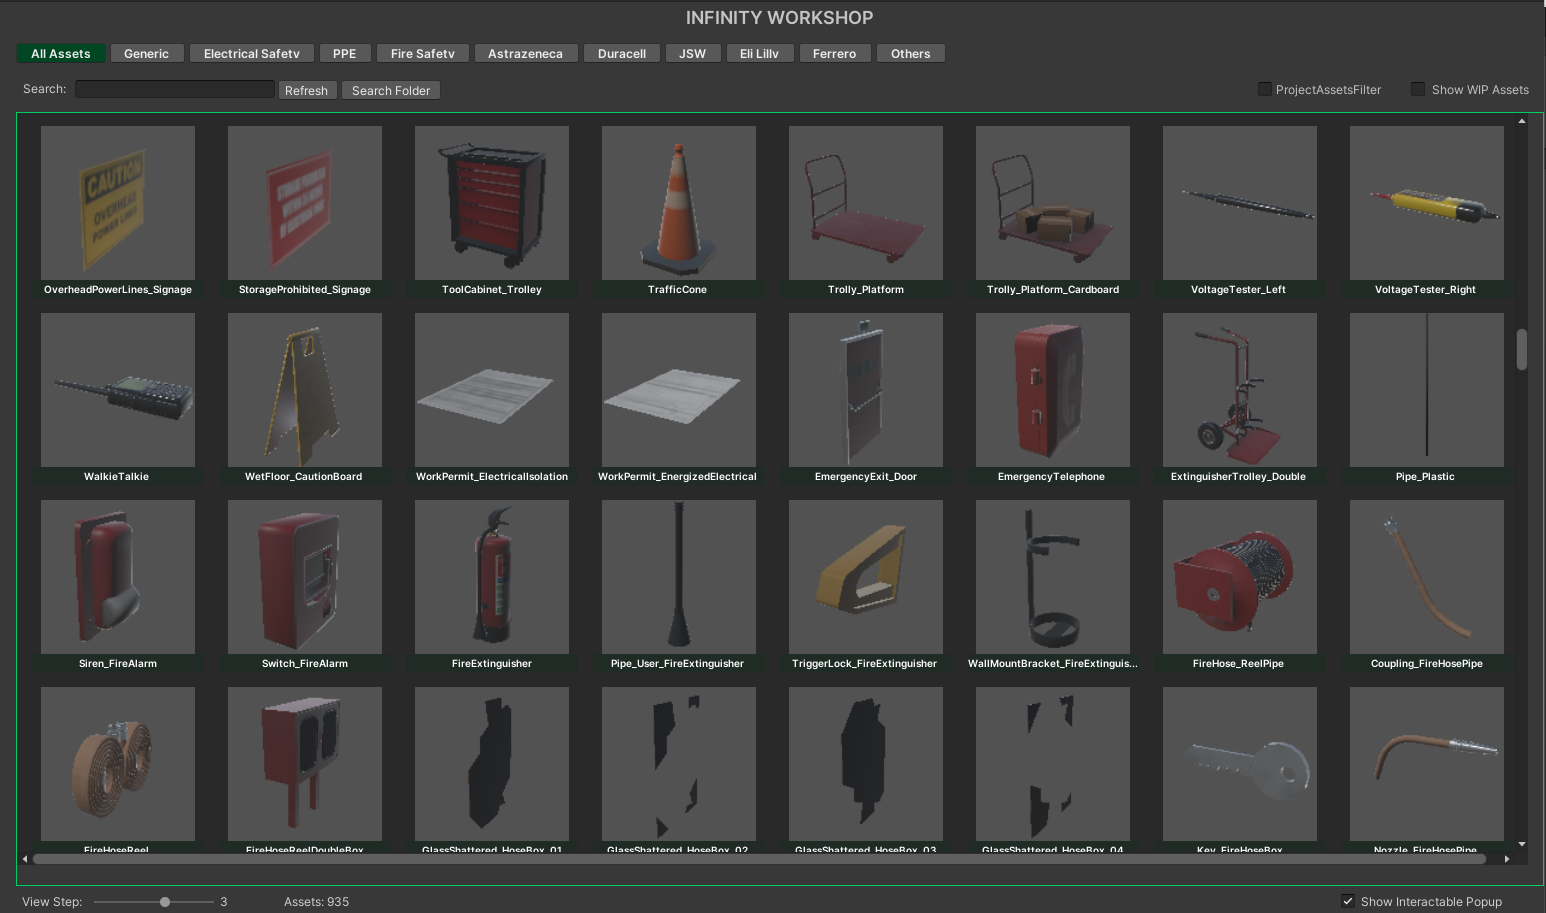
- Browse assets from predefined directories.
- Search, filter, and categorize assets efficiently.
- Drag and drop assets into the scene with customization options.
- Toggle Work-in-Progress (WIP) assets for better workflow management.
- Use project-based asset filtering to view only relevant content.
- Enable the “Show Interactable Popup” to add interaction components when placing assets.
Usage
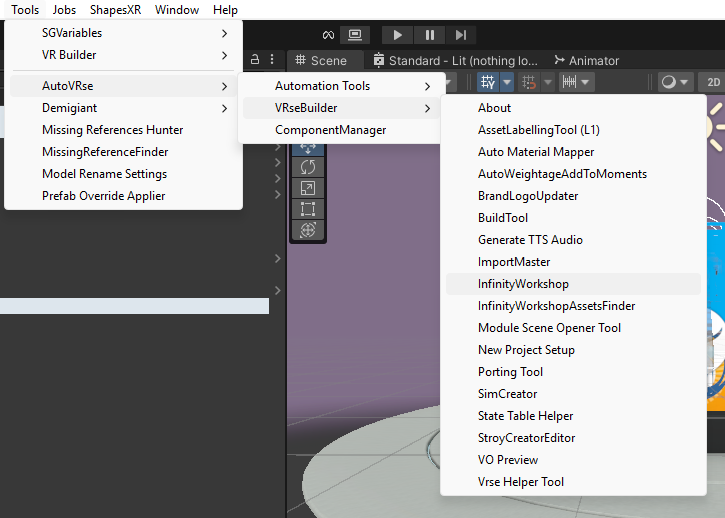
Find the tool in Unity
- Open Unity and navigate to the menu bar.
- Go to
Tools > AutoVRse > VRseBuilder > InfinityWorkshop. - Click on “InfinityWorkshop” to open the tool in a separate editor window.
Tip: You can dock the window anywhere in Unity for easier access!
Browse Assets
- The tool displays assets from linked directories.
- Use Category Tabs to filter assets based on different modules
- Search Bar: Quickly find assets by name.
- Multi-Label Search: Select multiple labels to refine results
- Project Assets Filter: Enables viewing only assets relevant to your active project.
- “Show in Project” → Highlights the asset in the Project window.
- “Copy Path” → Copies the asset’s path to the clipboard.

Using Assets
- Click to select individual assets
- Use Ctrl or Shift for multi-selection
- Drag and drop assets directly into the Scene View
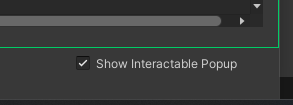
- Enable the “Show Interactable Popup” toggle in the UI
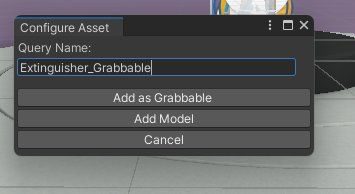
- When enabled, dragging an asset into the scene will prompt a popup asking whether to:
- Add the asset as a static model
- Add it as a grabbable object with interaction components
- If disabled, assets will be placed without the popup
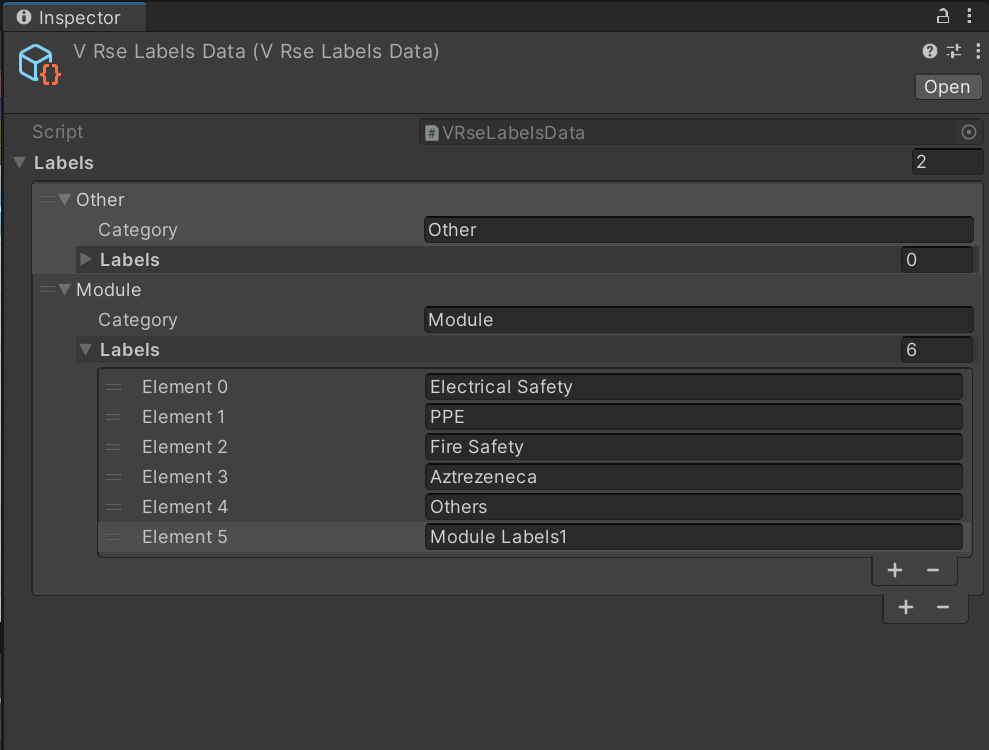
Labels
Labels Data is essential for categorizing and filtering assets within the tool. To modify or add new labels, follow these steps:Locate the Labels Data Asset
- Path in Project
-
The labels data is stored as an asset, typically found at:
-
The labels data is stored as an asset, typically found at:
- Open the Asset
- Navigate to the specified path in the Unity Project window
- Double-click on
VRseLabelsData.assetto open it in the Inspector
Editing Labels
-
Add a New Category:
- In the Inspector, you’ll find fields to add new categories
- Click the ”+” button to add a new category
- Name the Category: Provide a descriptive name (e.g., “Fire Safety”, “Electrical Components”)
-
Add Labels to a Category:
- Under each category, you can add multiple labels
- Click the ”+” button next to the labels list to add new labels
- Define Labels: Enter the label names that correspond to asset attributes or tags
-
Save Changes:
- After adding or modifying categories and labels, ensure you save the asset
- Unity automatically saves changes, but it’s good practice to verify
Reflecting Changes in Tool
-
Refresh the Tool:
- After updating the labels data, open or refresh the window
- The tool will automatically load the updated categories and labels

-
Verify the Changes:
- Check the Category Tabs in the tool to ensure new categories and labels appear as expected
- Test asset filtering based on the new labels to confirm functionality
FAQ
Q: Can I search for assets using multiple labels?Yes! Just select multiple labels in the Multi-Label Search section. Q: How do I make an asset interactable?
Enable the “Show Interactable Popup” toggle before dragging assets into the scene. Q: My asset previews are not loading correctly. What should I do?
Try clicking “Refresh”, or restart Unity if the issue persists.