Cloning your Project in Unity
Bring your generated story and assets from Studio to Unity
Unity Project Settings
Make sure your selected platform is Android
The setup comes with the correct projects settings, by default they are configured to build for Meta Quest
You may need to go to the settings to fine tune any oculus settings you need, there is handy compatibility checker in XR Plugin Management > Project Validation
Login to VRse Builder Services
Use your credentials and login, make sure you have access to the project you are trying to clone
You need to provide a username and password for the login, the same must be made on a Pulse dashboard with the appropriate role for the same
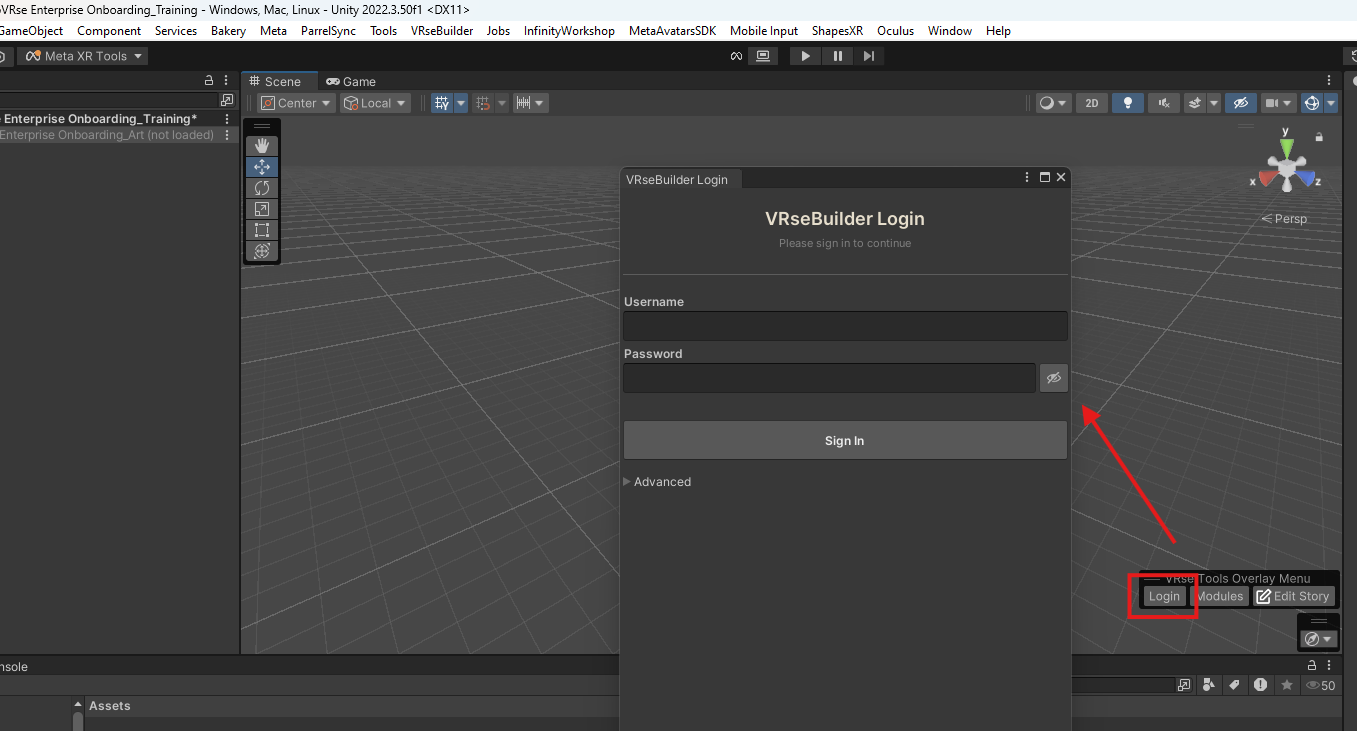
If the overlay menu is not visible for you, you can find the login window in VrseBulder > Auth > Login
Advanced Tab
If there are multiple instance of Studio running in your organization, it is possible to change the one Unity SDK is pointing at, simple drop down the advanced tab and change the base url mentioned there
VRse Studio Projects
All your project management can be done under one window now, the location of the same is mentioned below
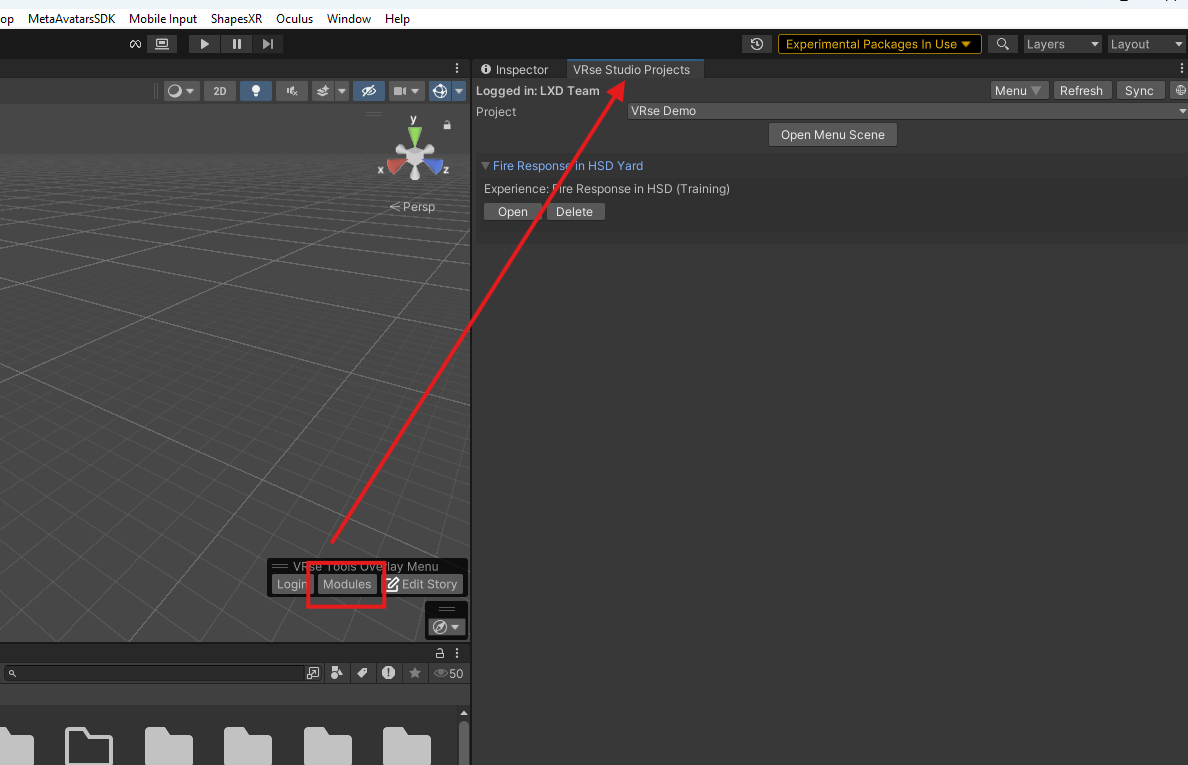
If your overlay menu is not visible, you can find the same in VRseBuilder > Studio Projects Window
Project Config
All project related settings and configuration are united under one window now, that can be found as below:
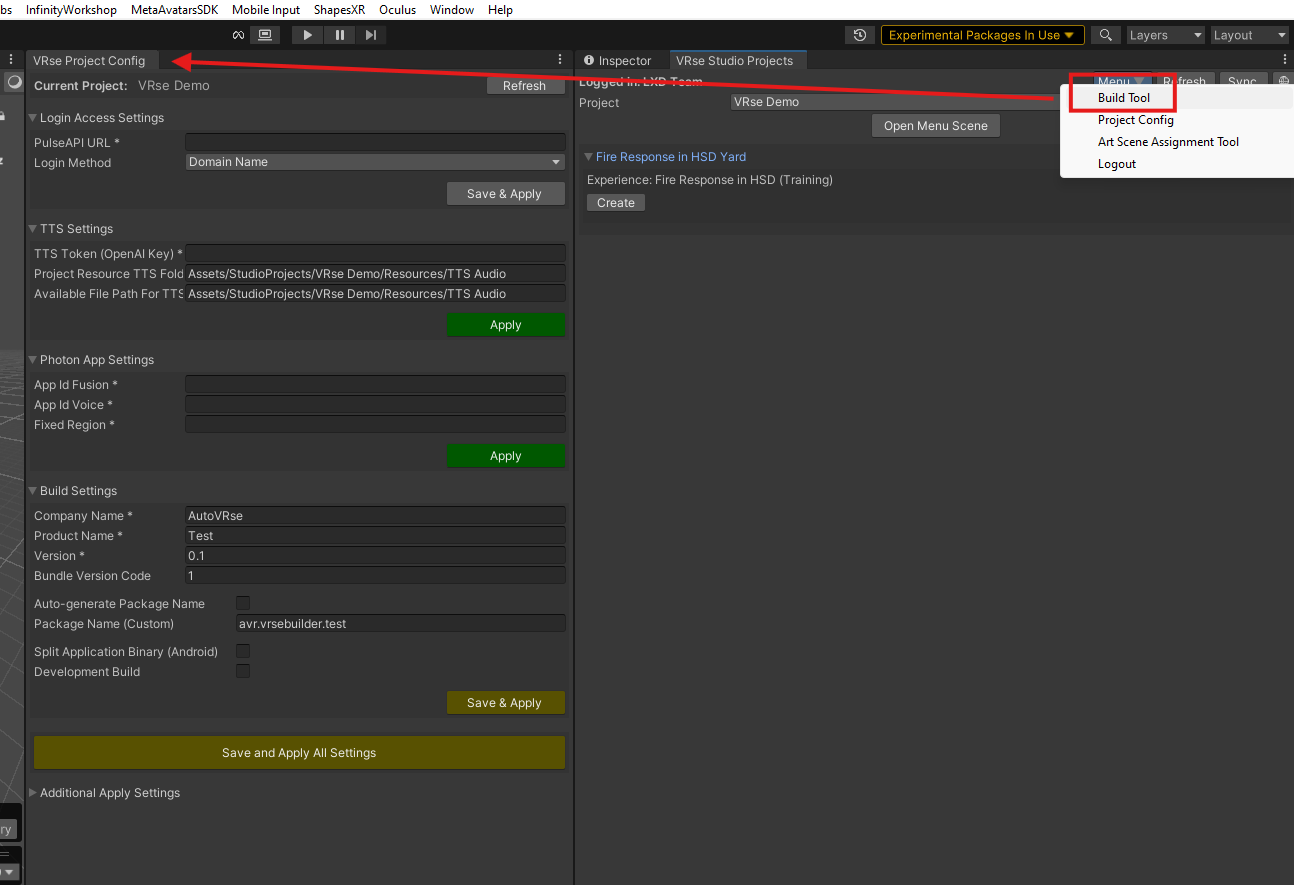
In case your overlay menu is not showing up you can find it in Menu > Project Config
You can set the following configurations as of now:
Login Access Settings
- PulseAPI URL: Backend API endpoint for your project
- Login Method: Authentication method (typically "DomainName")
Text-to-Speech (TTS) Settings
- TTS Token (OpenAI Key): API key for OpenAI text-to-speech services
- Confirm auto-generated paths for
Project Resource TTS Folder PathandAvailable File Path For TTS
Photon App Settings
- App Id Fusion: Application ID for Photon Fusion multiplayer services
- App Id Voice: Application ID for Photon Voice communication services
- Fixed Region (Optional): Preferred server region for network optimization
Unity Project Settings
- Company Name: Publisher/developer name for Unity build
- Product Name: Application name
- Package Naming Method: Choose "Auto-generate" or "Custom"
VRse Builder Configuration Files
These configuration files are now automatically created and need not be created/edited manually
You can create these normally how you would for any other Unity asset, right click on the Project window, Create>AutoVRse>VRseBuilder
Project Config
Create this file first, this is to set your project name, it also holds the other configuration files
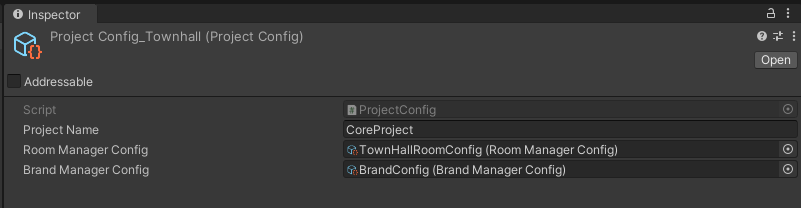
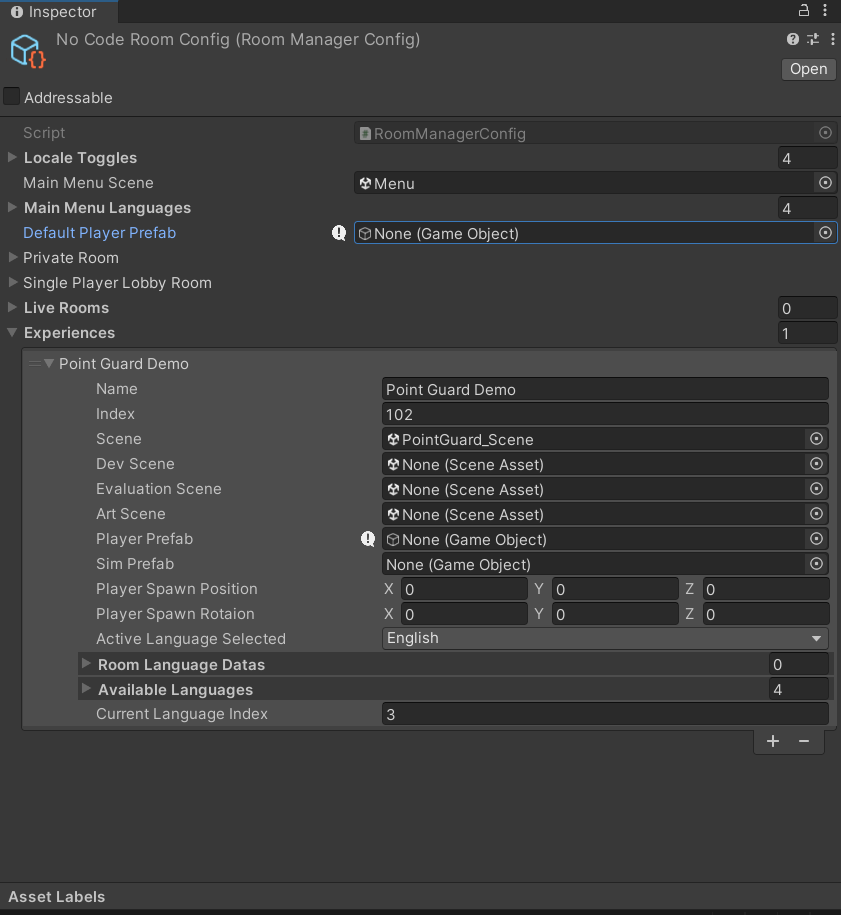
Room Config
Room config file contains information about the various scenes that you want to include in your application, this helps formatting the menu scene with data as well
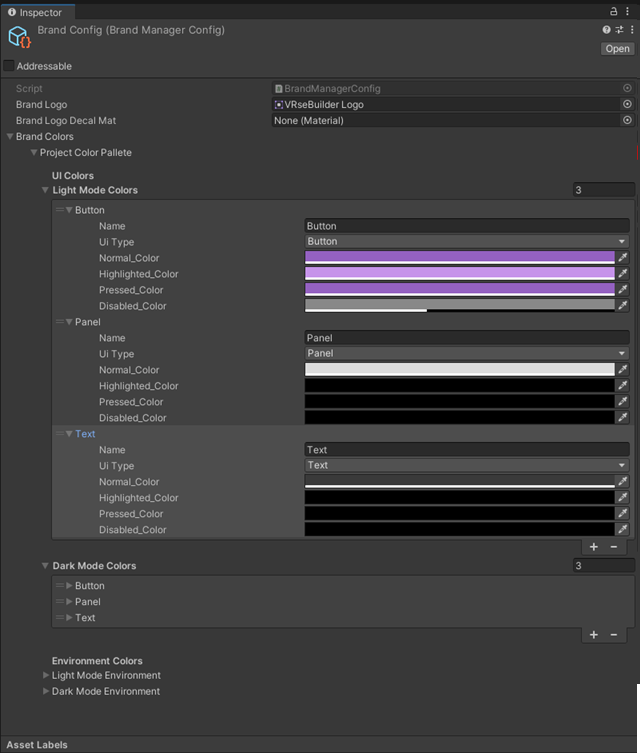
Brand Config
This one helps with the colors of your UI and any logos
You will need to setup your Color Palette for this setup to be finished
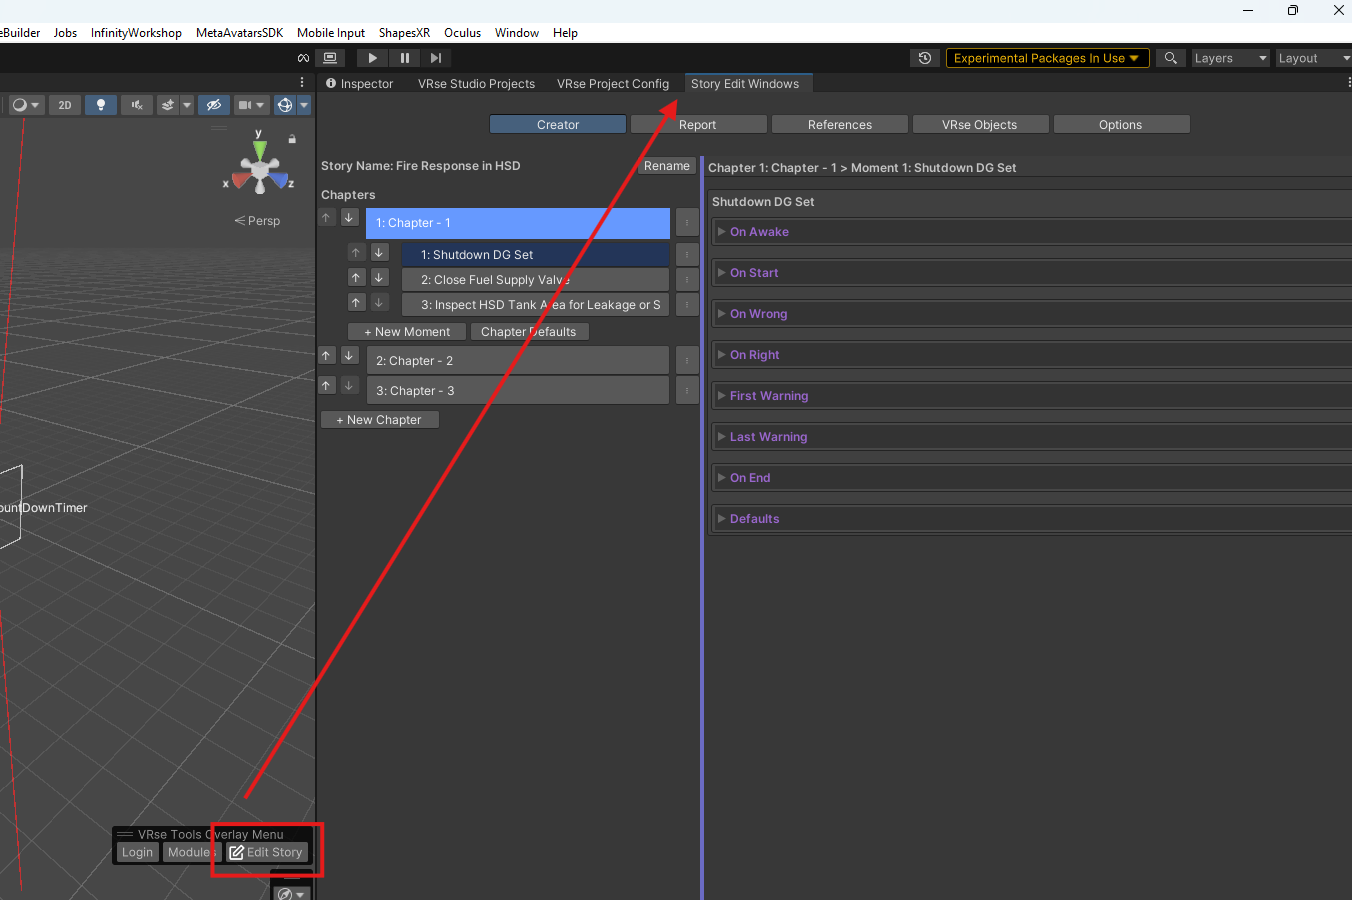
Story Editing Tool
New way to access story editing tool
Brand & Color Management
Easily add your brand colors and logos to the Standard UI kit provided in the development kit
Information in this section is missing
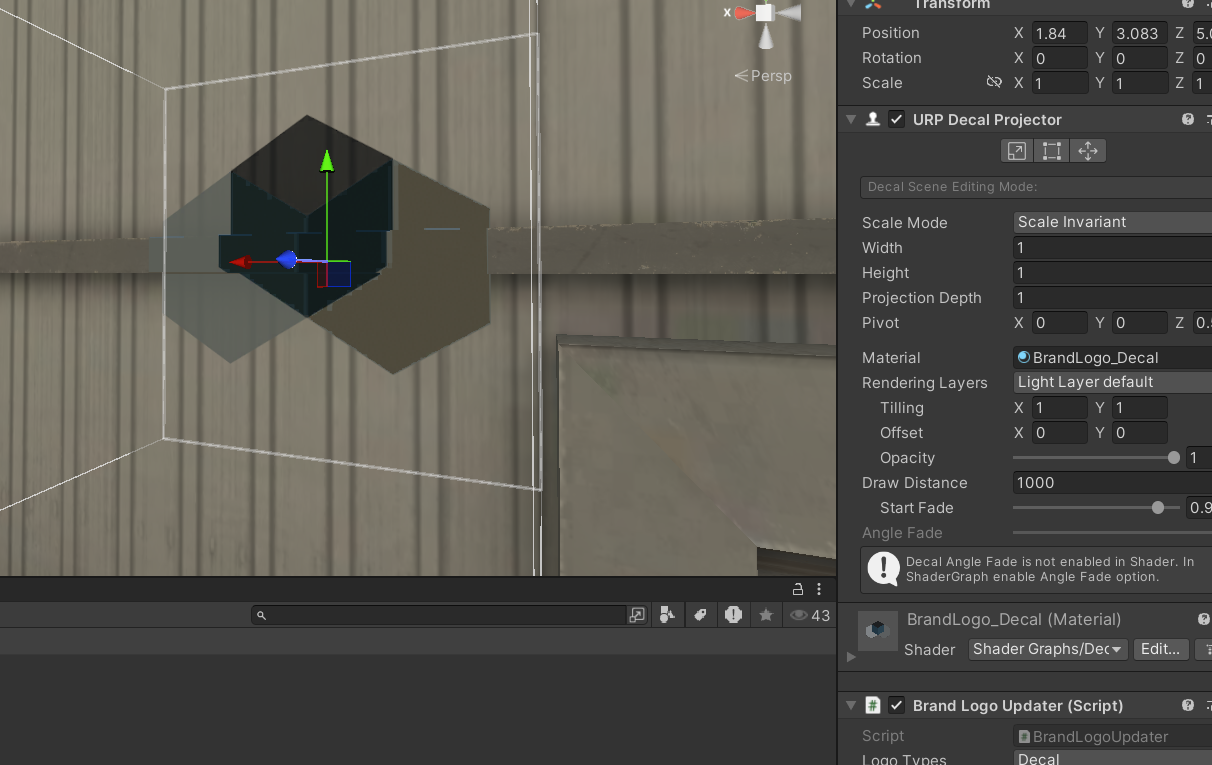
On your Hierarchy click on the + button on the top left, navigate to AutoVRse>VRse Builder>Logos
Pick the option you like and place it on your scene, this prefab will automatically get updated if you change the logo on Brand Config