> ## Documentation Index
> Fetch the complete documentation index at: https://docs-vrsebuilder.autovrse.app/llms.txt
> Use this file to discover all available pages before exploring further.
# Interactive UI Panels
> How to create your own interactive UI panels
Sometimes you want to have the user pick an option from a UI panel, maybe some text, or an image, or some buttons, may be all of them. Lets understand how the same can be done in VRse Builder.
There are a couple of ways to go about this in VRse Builder, you can use some pre-made panels, or you could design your own
## Media Panels
We have used a prefab from Meta SDK 71, from the PanelwithManipulators example scene, we have customized it and make three templates which are controllable by Actions.
Feel free to mess around with the canvas elements and change sizing of the canvas elements, but avoid scaling up or down the gameobject or its children itself
The panels can be found at `Assets/VRseBuilder/_Platform/MetaXR/Runtime/Prefabs/MediaPanels`\
Simply drag and drop the prefab on your scene, name it according to your use-case and start to use in your Story
### TextMediaPanel
Used to show text information on the panel
 **Edit text during Story (at Runtime)**
The panel can be controlled by the [TextMediaAction](/unity-sdk/actions#textmediaaction), you could add the action anywhere on your story to control the panel.
**Edit text during Story (at Runtime)**
The panel can be controlled by the [TextMediaAction](/unity-sdk/actions#textmediaaction), you could add the action anywhere on your story to control the panel.
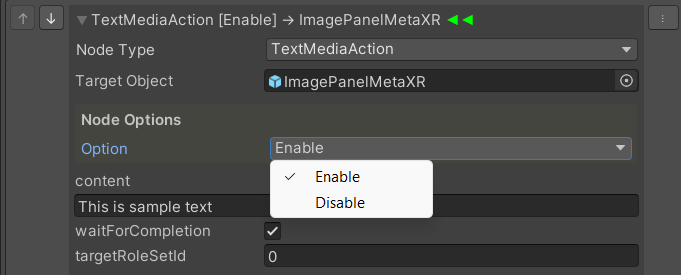 Simply create an action in your story, select the 'Enable' option in node options, and provide the content you want to display on your panel. You can use the 'Disable' option when you want to disable the panel
**Change Font/Size/Color**
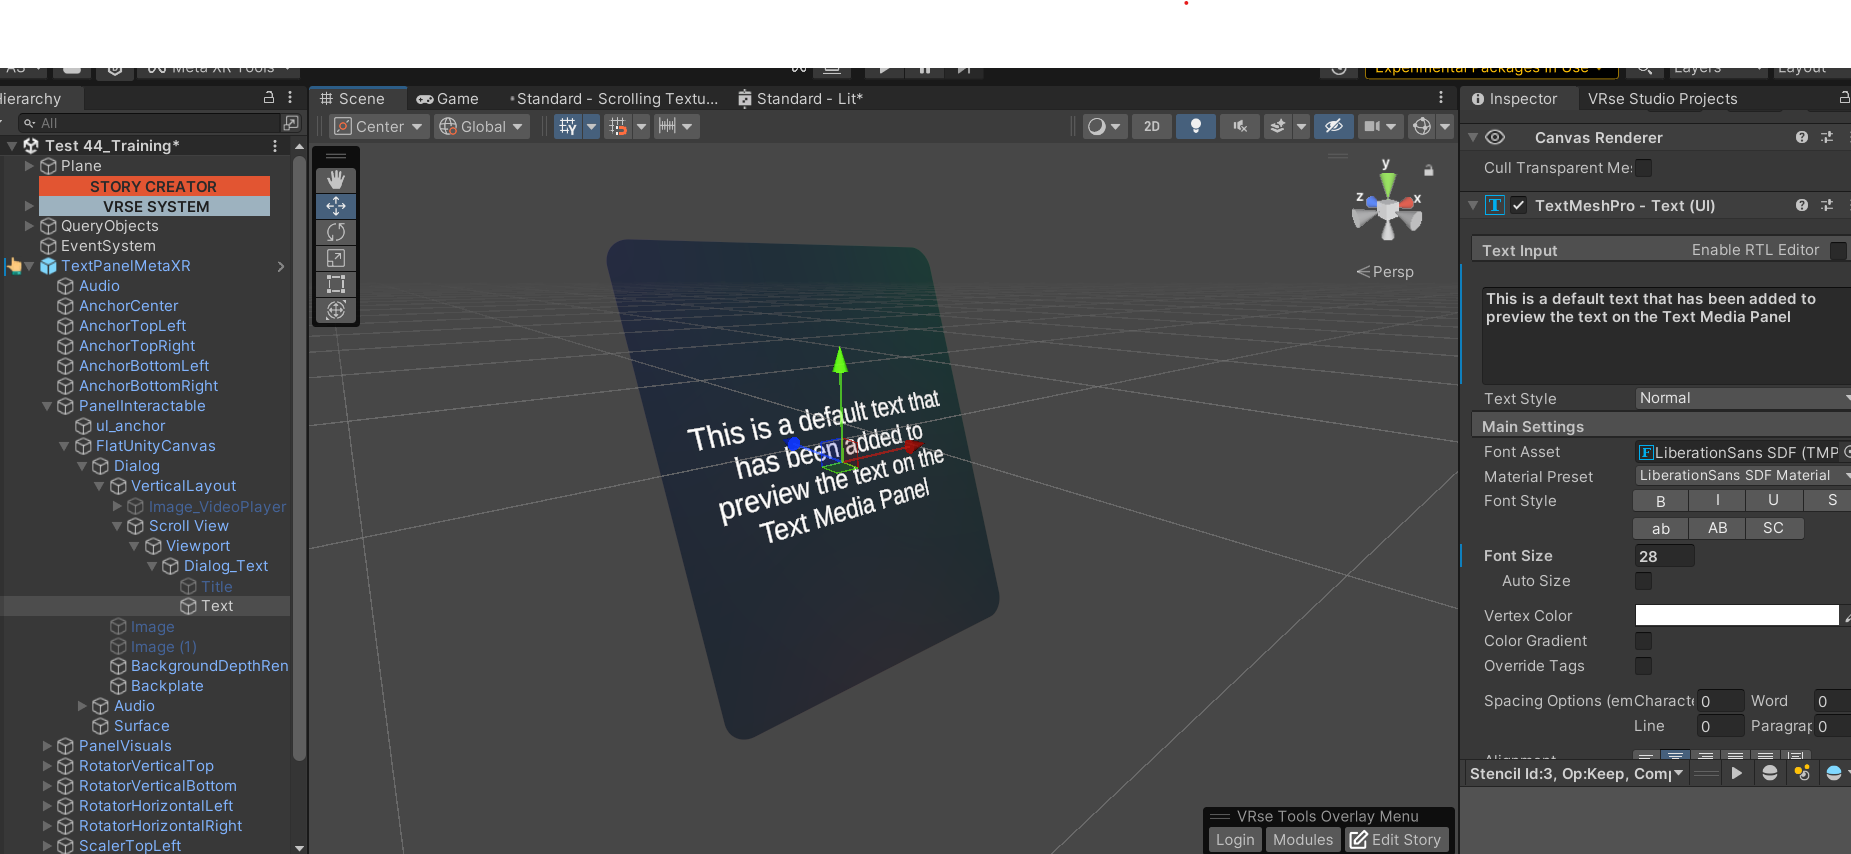
There is a child gameobject of the TextPanelMetaXR gameobject, you can find it as below
Simply create an action in your story, select the 'Enable' option in node options, and provide the content you want to display on your panel. You can use the 'Disable' option when you want to disable the panel
**Change Font/Size/Color**
There is a child gameobject of the TextPanelMetaXR gameobject, you can find it as below
 `PanelInteractable > FlatUnityCanvas > Dialog > VerticalLayout > Scroll View > Viewport > Dialog_Text > Text`
Select that gameobject next, and in the inspector you will get a few options, you can change the font/size/color there, you might have to provide some text in the TextInput field in order to preview your change
`PanelInteractable > FlatUnityCanvas > Dialog > VerticalLayout > Scroll View > Viewport > Dialog_Text > Text`
Select that gameobject next, and in the inspector you will get a few options, you can change the font/size/color there, you might have to provide some text in the TextInput field in order to preview your change
 Remember to remove the text in TextInput after you are done selecting your text options.
### ImageMediaPanel
Used to show an Image on the panel
Remember to remove the text in TextInput after you are done selecting your text options.
### ImageMediaPanel
Used to show an Image on the panel
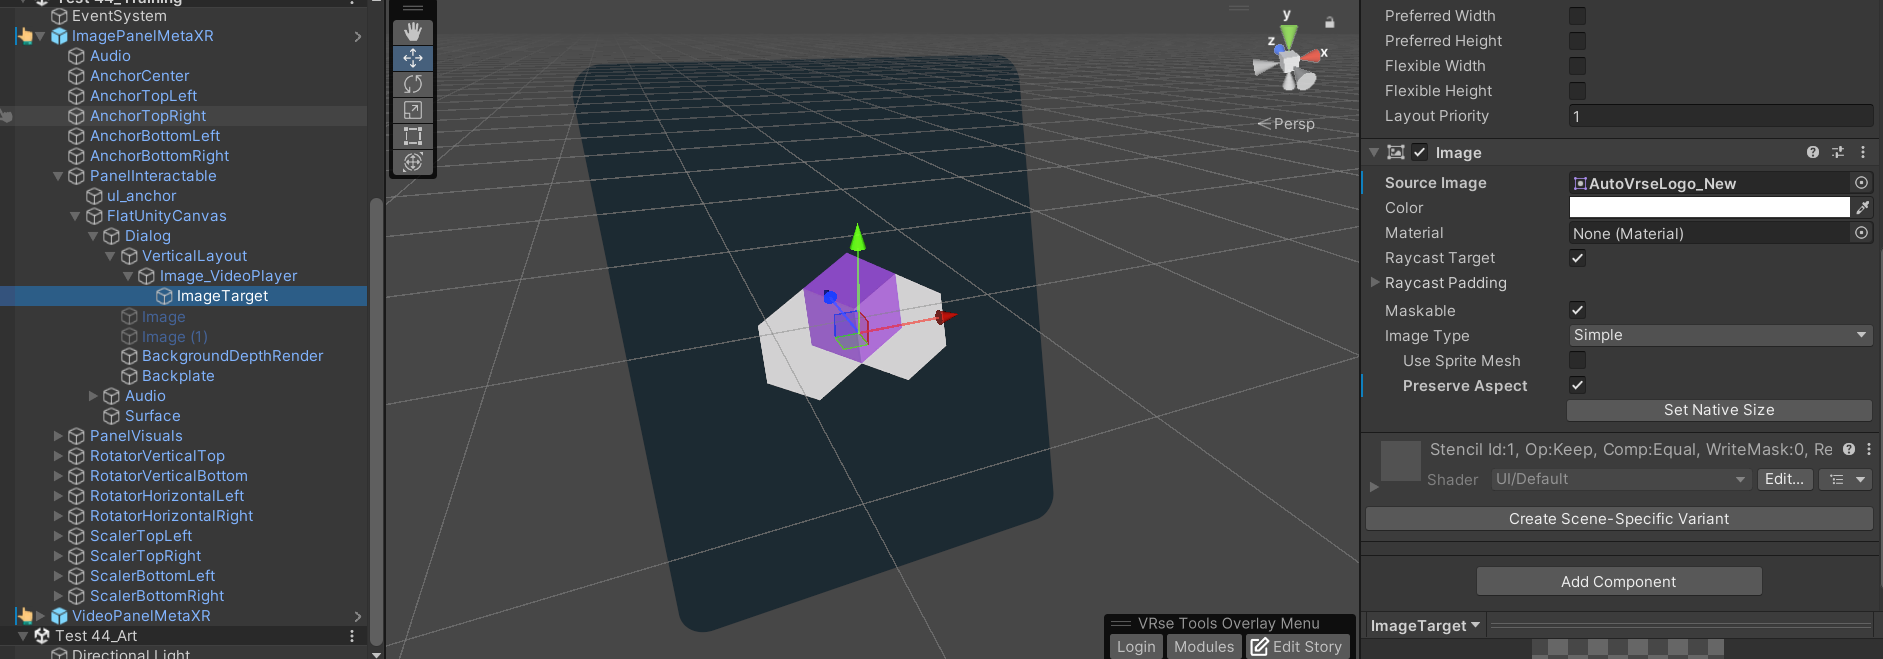 **Edit Images during Story (Runtime)**
The panel can be controlled by the [ImageMediaAction](/unity-sdk/actions#imagemediaaction), you could add the action anywhere on your story to control the panel.
Create the action in your story, select the 'Enable' option in node options.
In the **content field** we must provide the address of the image inside your [**Unity Project's Resources folder**](https://docs.unity3d.com/6000.3/Documentation/ScriptReference/Resources.html).
Simply create a folder named Resources anywhere in your Unity project, and drag and drop your images into that folder. For eg if your image is in `*/Resources/Project1/sample-image.png` for content field you must mention `"Project1/sample-image"` if the image is in the root of the Resources folder just "sample-image" should be enough
### VideoMediaPanel
Used to play a video on the panel
**Play/Edit Video during Story (Runtime)**
The panel can be controlled by the [VideoMediaAction](/unity-sdk/actions#videomediaaction), you could add the action anywhere on your story to control the panel.
Create the action in your story, select the 'Enable' option in node options.
Just like for images In the \*\*content field \*\*we must provide the address of the video inside your [**Unity Project's Resources folder**](https://docs.unity3d.com/6000.3/Documentation/ScriptReference/Resources.html).
Simply create a folder named Resources anywhere in your Unity project, and drag and drop your video into that folder. For eg if your image is in `*/Resources/Project1/sample-video.mp4`for content field you must mention `"Project1/sample-video"` if the videois in the root of the Resources folder just "sample-video" should be enough
### More about the Panels
**Customization**
Feel free to add/edit the panel Canvas to your heart's content, you can add more static text or images as a part of the panel already, you could change the background or its material, it should mostly work out fine, we have left this prefab open for edits so you can create a custom version of the panel.
Avoid removing any gameobjects, script or components from any of the gameobjects in the parent or children, if you are planning to, do so **at your own risk.**
**Moving the Panel Around**
The recommended way to move the panel or any gameobject around is to use the [ObjectAnimationAction](/unity-sdk/actions#objectanimationaction), the same would need the panel's parent as the Query and a targetTransform which should be the final desitination. Make sure to chose PositionRotation in the options to make your panel fly to the destination
## Custom UI
You can add customized UI, which can be somewhat controlled by VRseBuilder actions and triggers
The template for this can be found in BuildingBlocks window, simple navigate to `VRseBuilder > BuildingBlocks`
**Edit Images during Story (Runtime)**
The panel can be controlled by the [ImageMediaAction](/unity-sdk/actions#imagemediaaction), you could add the action anywhere on your story to control the panel.
Create the action in your story, select the 'Enable' option in node options.
In the **content field** we must provide the address of the image inside your [**Unity Project's Resources folder**](https://docs.unity3d.com/6000.3/Documentation/ScriptReference/Resources.html).
Simply create a folder named Resources anywhere in your Unity project, and drag and drop your images into that folder. For eg if your image is in `*/Resources/Project1/sample-image.png` for content field you must mention `"Project1/sample-image"` if the image is in the root of the Resources folder just "sample-image" should be enough
### VideoMediaPanel
Used to play a video on the panel
**Play/Edit Video during Story (Runtime)**
The panel can be controlled by the [VideoMediaAction](/unity-sdk/actions#videomediaaction), you could add the action anywhere on your story to control the panel.
Create the action in your story, select the 'Enable' option in node options.
Just like for images In the \*\*content field \*\*we must provide the address of the video inside your [**Unity Project's Resources folder**](https://docs.unity3d.com/6000.3/Documentation/ScriptReference/Resources.html).
Simply create a folder named Resources anywhere in your Unity project, and drag and drop your video into that folder. For eg if your image is in `*/Resources/Project1/sample-video.mp4`for content field you must mention `"Project1/sample-video"` if the videois in the root of the Resources folder just "sample-video" should be enough
### More about the Panels
**Customization**
Feel free to add/edit the panel Canvas to your heart's content, you can add more static text or images as a part of the panel already, you could change the background or its material, it should mostly work out fine, we have left this prefab open for edits so you can create a custom version of the panel.
Avoid removing any gameobjects, script or components from any of the gameobjects in the parent or children, if you are planning to, do so **at your own risk.**
**Moving the Panel Around**
The recommended way to move the panel or any gameobject around is to use the [ObjectAnimationAction](/unity-sdk/actions#objectanimationaction), the same would need the panel's parent as the Query and a targetTransform which should be the final desitination. Make sure to chose PositionRotation in the options to make your panel fly to the destination
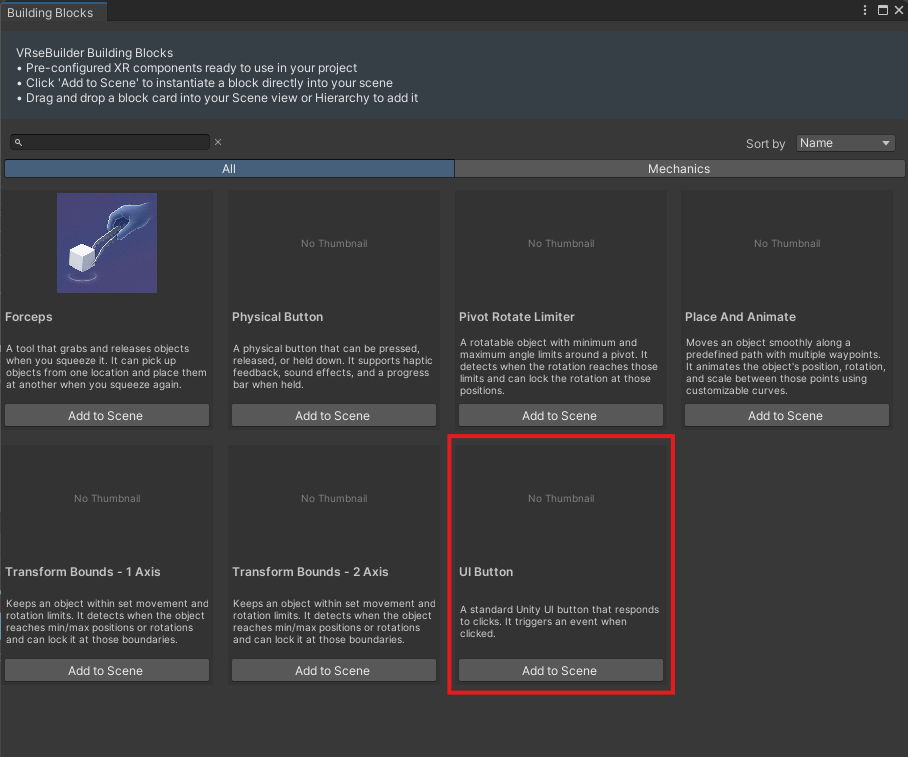
## Custom UI
You can add customized UI, which can be somewhat controlled by VRseBuilder actions and triggers
The template for this can be found in BuildingBlocks window, simple navigate to `VRseBuilder > BuildingBlocks`
 On the scene gets added a worldspace Canvas callewd UIButtonWithCanvas\_Block as in the image below.
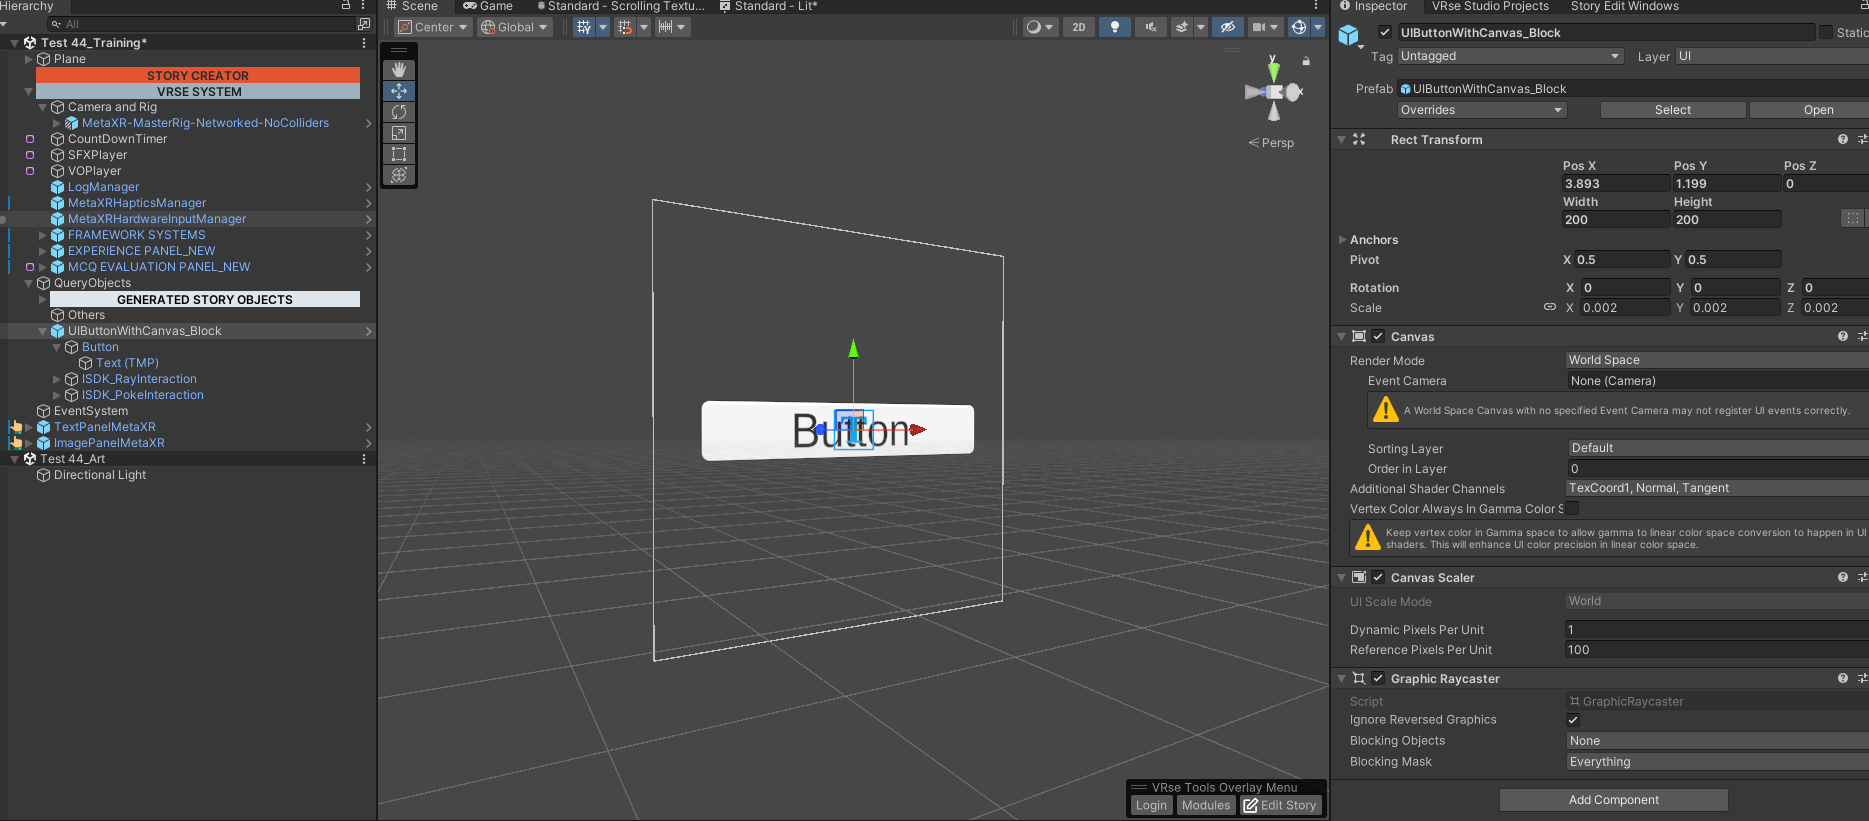 This is the base for your Custom UI, feel free to edit/add/delete more elements to this canvas and design your perfect UI. There is no restriction on designing your Interface in this element
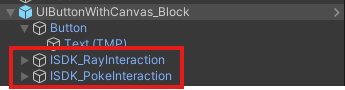
The same is both interactable with a laser pointer or can be touched with virtual hand in VR
You must not delete ISDK\_RayInteraction & ISDK\_PokeInteraction from the heirarchy of the canvas, this will cause events not register correctly and subsequently the actions and triggers no working correctly
This is the base for your Custom UI, feel free to edit/add/delete more elements to this canvas and design your perfect UI. There is no restriction on designing your Interface in this element
The same is both interactable with a laser pointer or can be touched with virtual hand in VR
You must not delete ISDK\_RayInteraction & ISDK\_PokeInteraction from the heirarchy of the canvas, this will cause events not register correctly and subsequently the actions and triggers no working correctly
 **Detecting Button as Triggers**
Buttons made on this UI can be detected using \*\*UIButtonTrigger, \*\*simply add the trigger OnRight or OnWrong, there is only one option "OnClick", add the button you want to detect click on as Target Object.
**Detecting Button as Triggers**
Buttons made on this UI can be detected using \*\*UIButtonTrigger, \*\*simply add the trigger OnRight or OnWrong, there is only one option "OnClick", add the button you want to detect click on as Target Object.
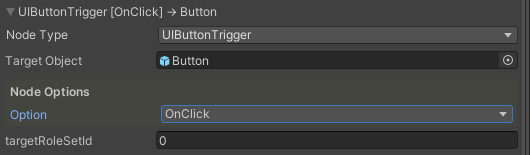 The button can be clicked both touching with hand or finger inside VR and with a Raycast pointer and pinch gesture as well.
**Editing Text from Actions**
**\< Not available yet >**
The button can be clicked both touching with hand or finger inside VR and with a Raycast pointer and pinch gesture as well.
**Editing Text from Actions**
**\< Not available yet >**