> ## Documentation Index
> Fetch the complete documentation index at: https://docs-vrsebuilder.autovrse.app/llms.txt
> Use this file to discover all available pages before exploring further.
# Build your story with AI Chat
> Use AI Chat to generate a VR experience
Studio is a utility for content writers, you can dump your information here and work with our pre-trained VR expert agents and design a story, one things to note is that this tool will help you create a blueprint of the experience, as of the current version there is no direct generation of VR experience from a prompt, but wel get there soon!
## Get Started
The first step is to **have a well-written script or SOP** of what you want to make. Before we create any sort of experience a designer would sit down and compile the whole experience together, which mentions every things that happens during the course of it and when user interacts with various objects. Its a document outlining step by step information about your story
 Studio uses Generative AI to help with this. Below is a guide that explains what needs to be done. The documentation is tuned to create Industrial VR trainings. After logging into to studio with your credentials, follow the guide below
### Create your Project & Module
Setup your workspace on studio, you can read a detailed doc here: [Users & Projects](/studio/projects)
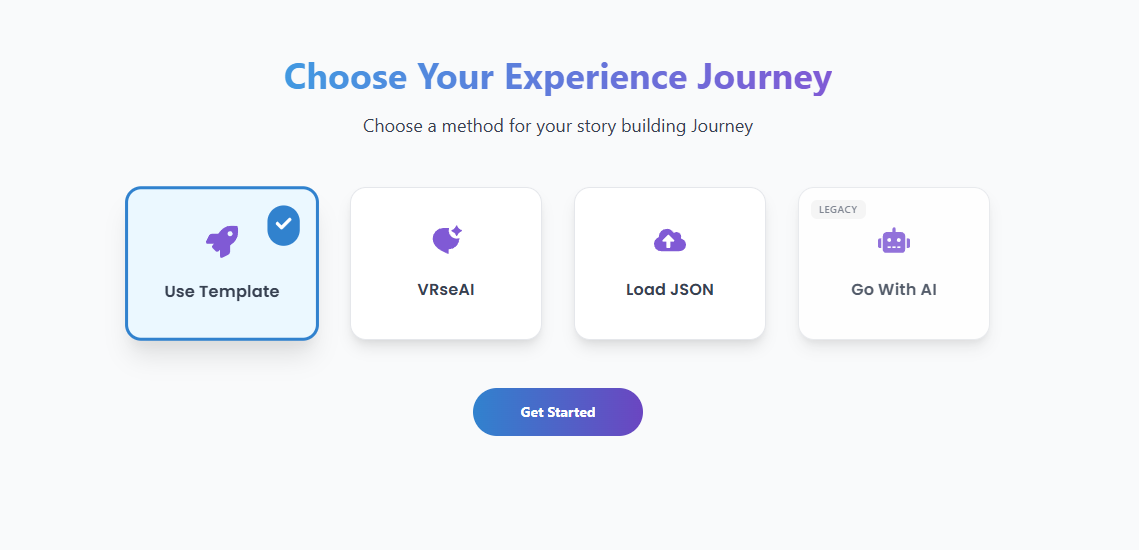
### Generate Story with VRseAI
This is our new chat based interface which helps create a VR ready blueprint of your story. All you need to do here is give it a prompt of what kind of experience you want it to generate, you can go like "Create a VR experience for me for the following data: \"
Studio uses Generative AI to help with this. Below is a guide that explains what needs to be done. The documentation is tuned to create Industrial VR trainings. After logging into to studio with your credentials, follow the guide below
### Create your Project & Module
Setup your workspace on studio, you can read a detailed doc here: [Users & Projects](/studio/projects)
### Generate Story with VRseAI
This is our new chat based interface which helps create a VR ready blueprint of your story. All you need to do here is give it a prompt of what kind of experience you want it to generate, you can go like "Create a VR experience for me for the following data: \"
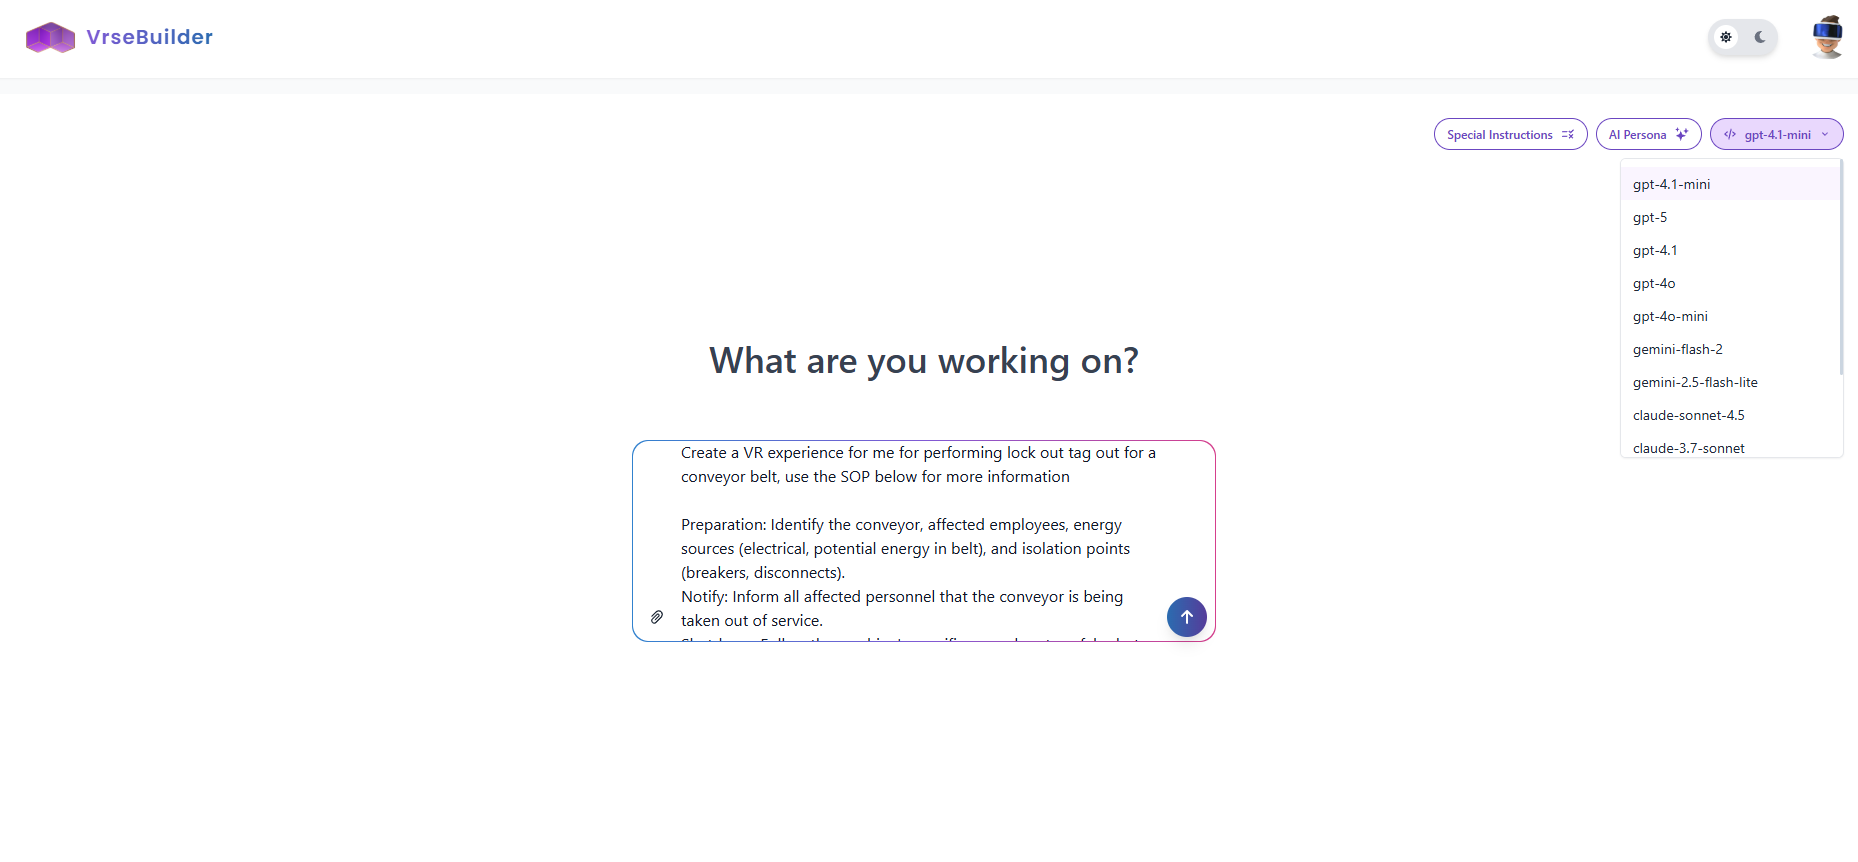 **Chose your Model** - Pick between the various LLM options that are provided in the drop-down on the top right\
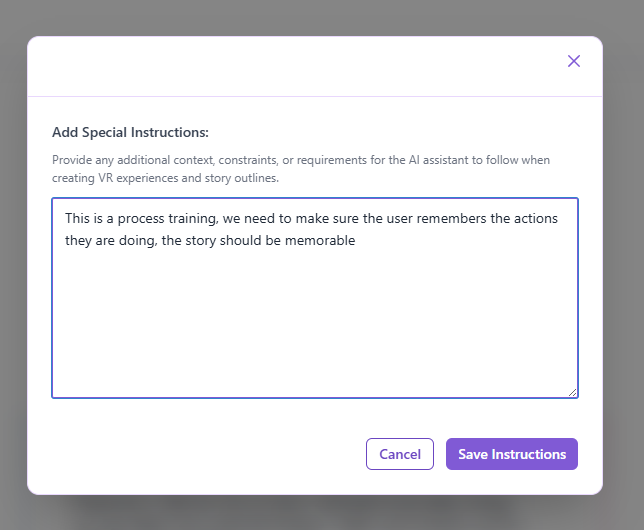
**Special Instructions** - Add any special instructions you want to give as a part of the system prompt
**Chose your Model** - Pick between the various LLM options that are provided in the drop-down on the top right\
**Special Instructions** - Add any special instructions you want to give as a part of the system prompt
 Once you are happy with your input, hit "Generate", we have to wait next. the workflow could take 3-5 minutes to finish
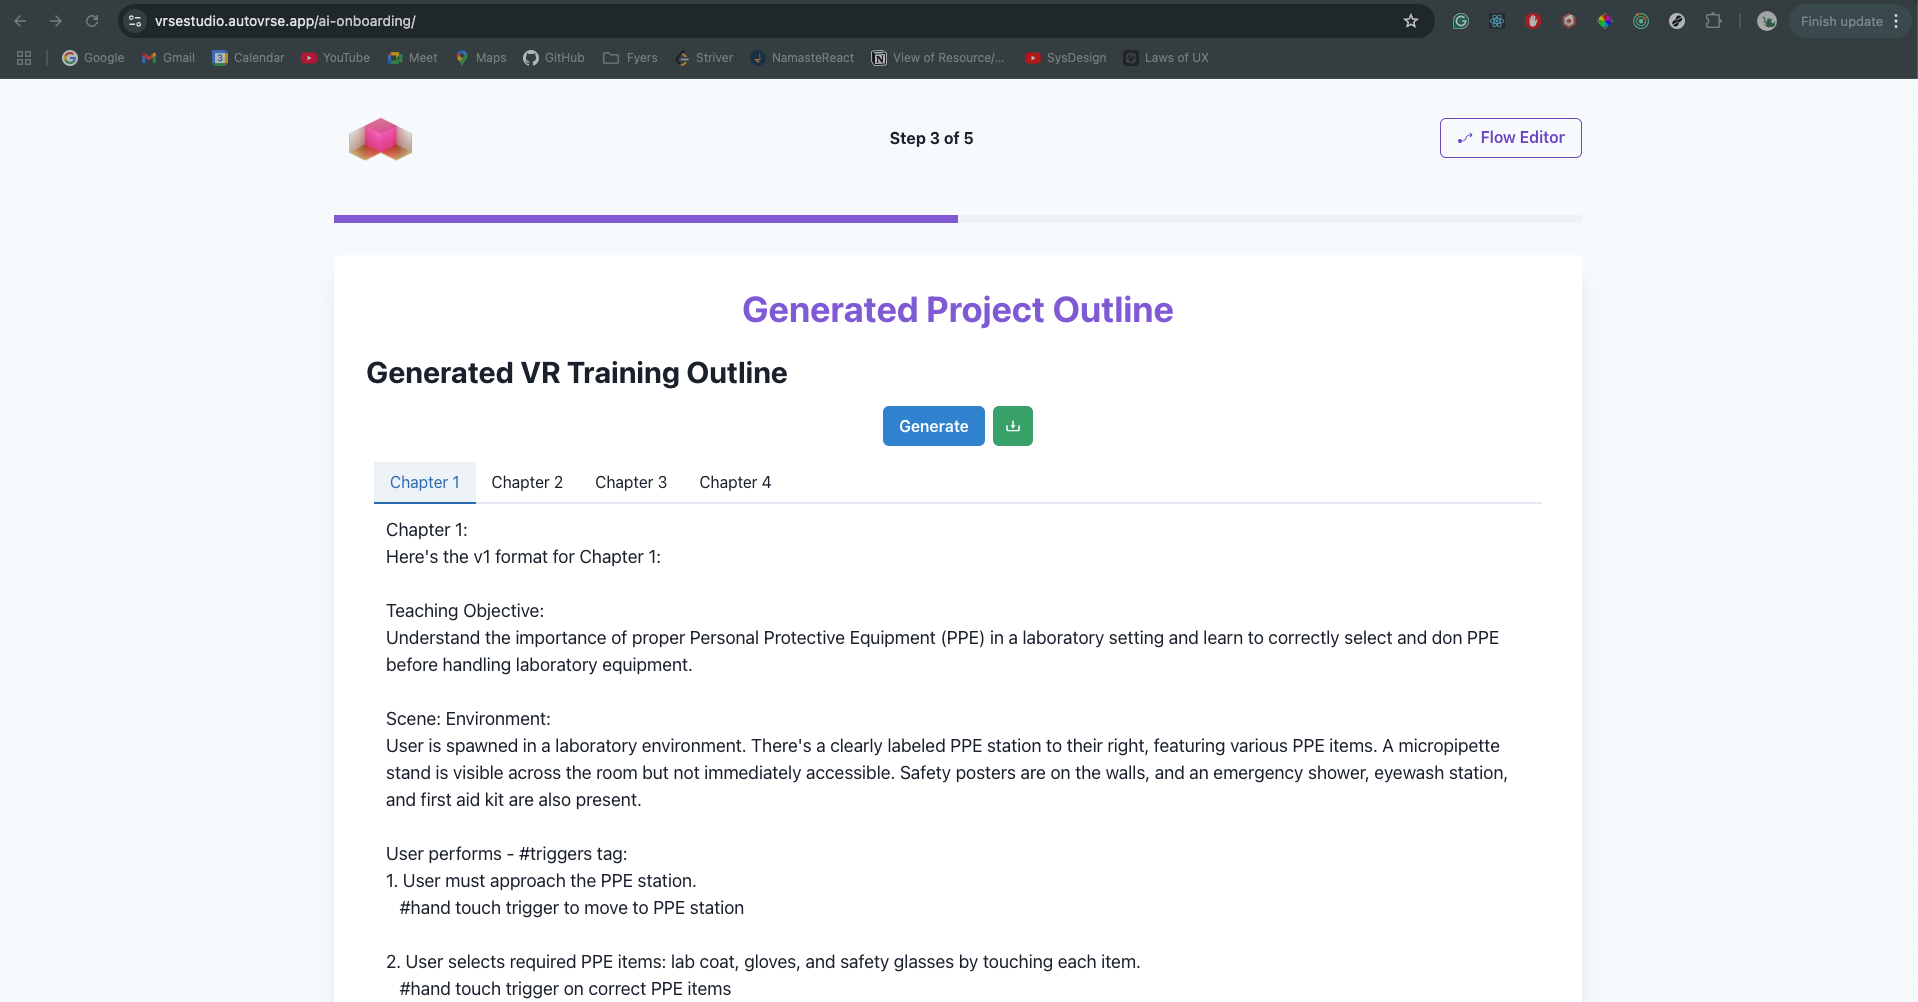
An outline document for your input will be generated, this will be split into Chapters and Moments, you can read more about the [Design system ](/pulse/design-system)if you are confused at this point, it will be a step by step breakdown of what your VR experience is suppoed to be like, it will also have a list of objects that are involved in the story and a small description for the same.
Once you are happy with your input, hit "Generate", we have to wait next. the workflow could take 3-5 minutes to finish
An outline document for your input will be generated, this will be split into Chapters and Moments, you can read more about the [Design system ](/pulse/design-system)if you are confused at this point, it will be a step by step breakdown of what your VR experience is suppoed to be like, it will also have a list of objects that are involved in the story and a small description for the same.
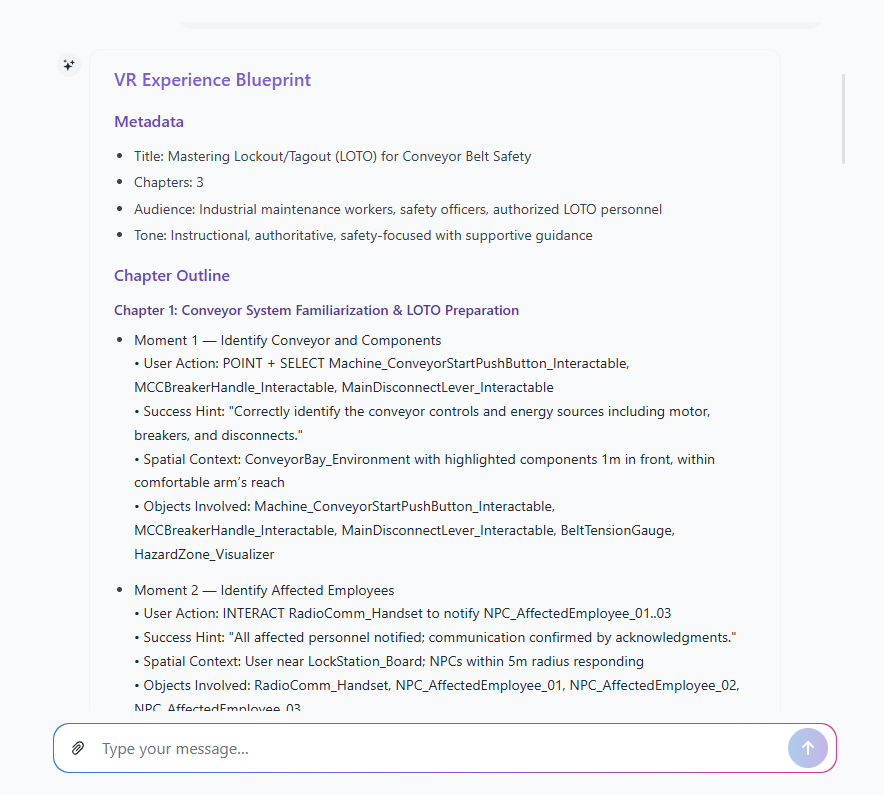 You can continue chatting with the agent here and keep iterating on your outline, once you are happy with what you have, hit "Apply Outline", the outline will now start converting to a VR-Ready story.
The build now will take a 3-5 minutes, once it is ready, you will have your story ready to be edited further using the [List ](/studio/list-view)and [Graph](/studio/graph-view) views, and sent to the Unity for further development.
You can continue chatting with the agent here and keep iterating on your outline, once you are happy with what you have, hit "Apply Outline", the outline will now start converting to a VR-Ready story.
The build now will take a 3-5 minutes, once it is ready, you will have your story ready to be edited further using the [List ](/studio/list-view)and [Graph](/studio/graph-view) views, and sent to the Unity for further development.
 Continue the guide to understand [How to build your story in Unity](/guides/unity-usage)
### Legacy Guides
This guide is outdated as of Version 0.5.1
The first step is to have a well-written script. Before we create any sort of experience a designer would sit down and compile the whole experience together, which mentions every things that happens during the course of it and when user interacts with various objects. We use Generative AI to help with this. Below is a guide that explains what needs to be done. The documentation is tuned to create Industrial VR trainings
# Get your SOP Document
You need a well-formatted SOP (Standard Operating Procedure) which has all the essential step-by-step information on how the training needs to be done.
After you have your SOP ready, open VRse Creation Studio Link
# Bot 1 - SOP to VR SOP (SOP to V1)
In this step, we will convert our ready perfect SOP into a story that is fit for creating VR Experiences via VRse Builder
Remember you can only upload Text and Images to these bots, So convert any PDFs, Videos etc to a TEXT format.
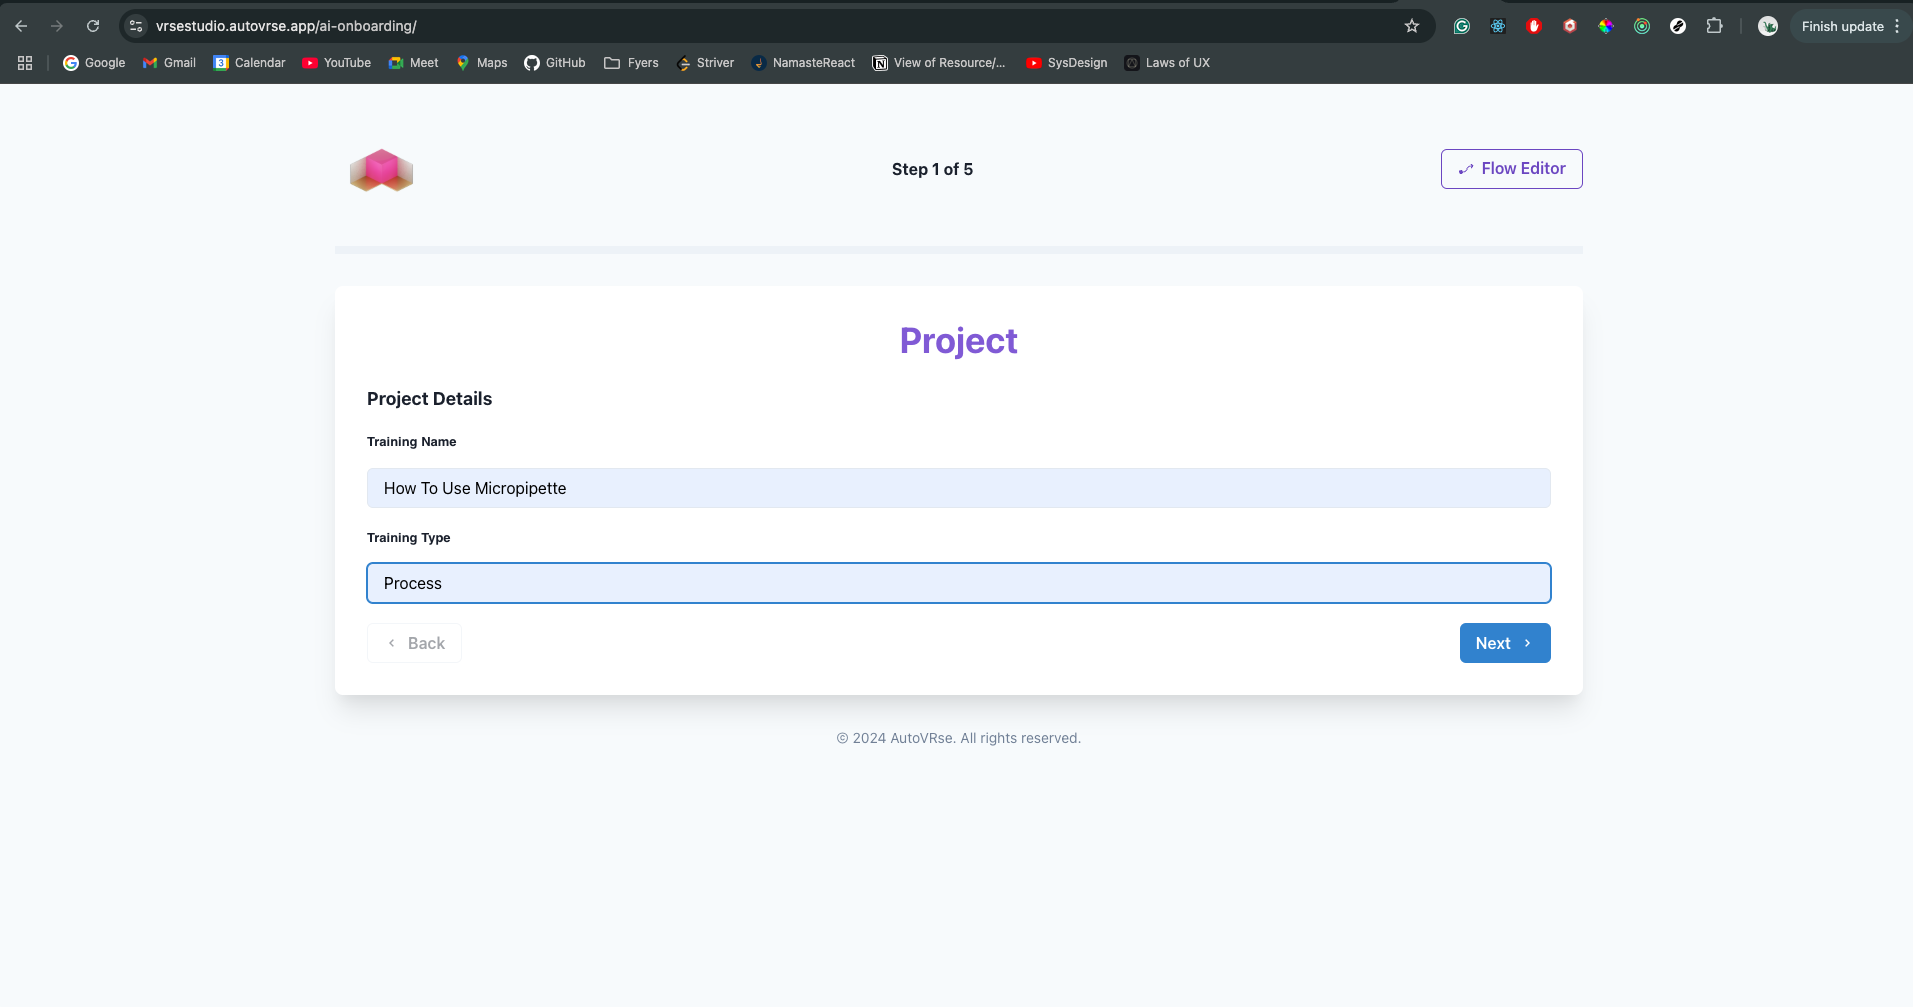
First, Enter the details in the form:
**Training Name** - eg: Work at Height, Driving Forklifts, QA lab testing
**Training Type** - eg: Process/Safety
**Traying Type of Docs Attached:** SOP
**Training Docs Text:** Paste your SOP here
**Upload Images:** You can upload any images here (1 MB max Suggested per image)
Once done press ‘Next’ and wait for the Bot to Generate the output
Bot 1 will take approximately ‘4-5’ minutes to finish running
Step 1 - Add fields
Continue the guide to understand [How to build your story in Unity](/guides/unity-usage)
### Legacy Guides
This guide is outdated as of Version 0.5.1
The first step is to have a well-written script. Before we create any sort of experience a designer would sit down and compile the whole experience together, which mentions every things that happens during the course of it and when user interacts with various objects. We use Generative AI to help with this. Below is a guide that explains what needs to be done. The documentation is tuned to create Industrial VR trainings
# Get your SOP Document
You need a well-formatted SOP (Standard Operating Procedure) which has all the essential step-by-step information on how the training needs to be done.
After you have your SOP ready, open VRse Creation Studio Link
# Bot 1 - SOP to VR SOP (SOP to V1)
In this step, we will convert our ready perfect SOP into a story that is fit for creating VR Experiences via VRse Builder
Remember you can only upload Text and Images to these bots, So convert any PDFs, Videos etc to a TEXT format.
First, Enter the details in the form:
**Training Name** - eg: Work at Height, Driving Forklifts, QA lab testing
**Training Type** - eg: Process/Safety
**Traying Type of Docs Attached:** SOP
**Training Docs Text:** Paste your SOP here
**Upload Images:** You can upload any images here (1 MB max Suggested per image)
Once done press ‘Next’ and wait for the Bot to Generate the output
Bot 1 will take approximately ‘4-5’ minutes to finish running
Step 1 - Add fields
 Step 2 - Add Required SOP
 Step 3 - Click on ‘Generate’ to Generate a Training
 Once the output is generated from the previous bot, go through it once if you don’t like the output, **re-run Bot 1** with the same information or try to tweak your SOP so it gives better output.
# Bot 2 - VR SOP to VR Script (V1 to V2)
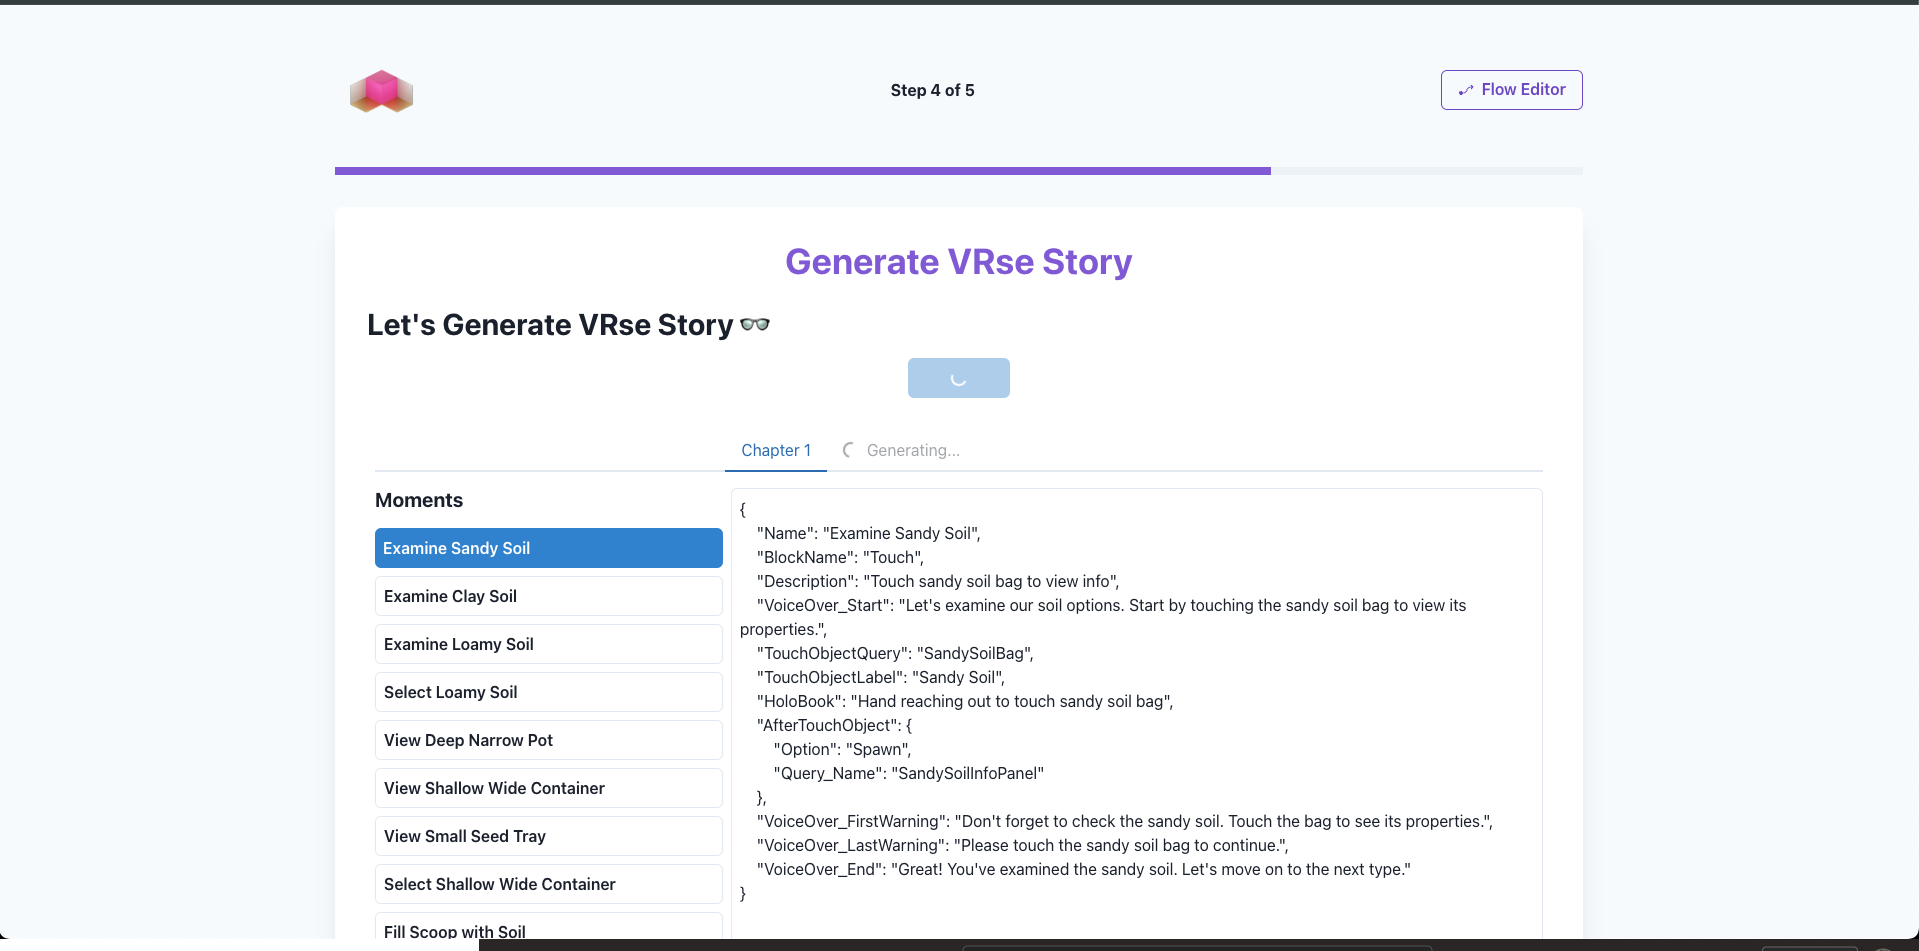
Now, we convert the V1 output to a vrse-builder readable format (JSON-like).
You **cannot edit** this output, But if you are unhappy with the output you can always re-run the bot.
Step 1 - Click on ‘Generate’ to Generate VRse Story - This is **NOT** editable.
Once the output is generated from the previous bot, go through it once if you don’t like the output, **re-run Bot 1** with the same information or try to tweak your SOP so it gives better output.
# Bot 2 - VR SOP to VR Script (V1 to V2)
Now, we convert the V1 output to a vrse-builder readable format (JSON-like).
You **cannot edit** this output, But if you are unhappy with the output you can always re-run the bot.
Step 1 - Click on ‘Generate’ to Generate VRse Story - This is **NOT** editable.
 Step 2 - Click On Next and Move Ahead
Once you are happy with what you have press **‘Proceed To Studio’** , this will run the next generation, and no extra data inputs are required.
Bot 2 will take approximately **‘5-6’** minutes to finish running
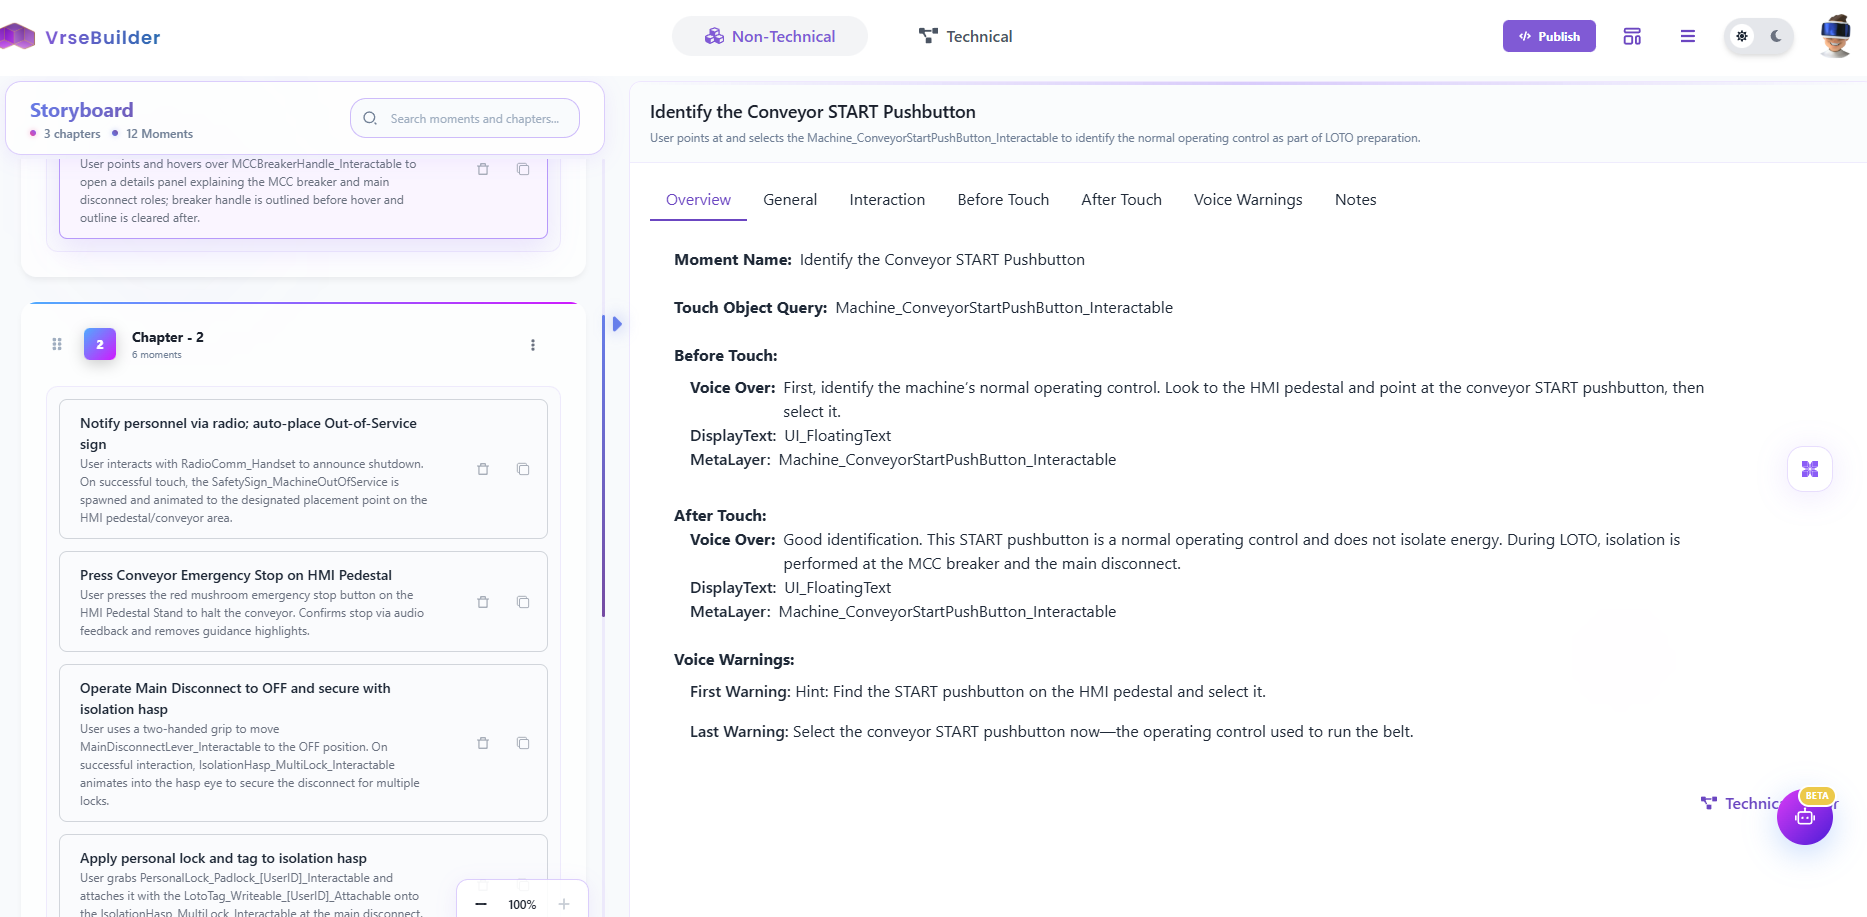
# Editing in Studio
**Final Step - Click ‘Proceed To Studio’ & Select a ‘Chapter’**
Here you can Edit add moments and Stuff.
For now, we have ‘Touch Moment’ working, and the rest are in WIP. But you can still add and try to tinker. Have FUN!
Step 2 - Click On Next and Move Ahead
Once you are happy with what you have press **‘Proceed To Studio’** , this will run the next generation, and no extra data inputs are required.
Bot 2 will take approximately **‘5-6’** minutes to finish running
# Editing in Studio
**Final Step - Click ‘Proceed To Studio’ & Select a ‘Chapter’**
Here you can Edit add moments and Stuff.
For now, we have ‘Touch Moment’ working, and the rest are in WIP. But you can still add and try to tinker. Have FUN!
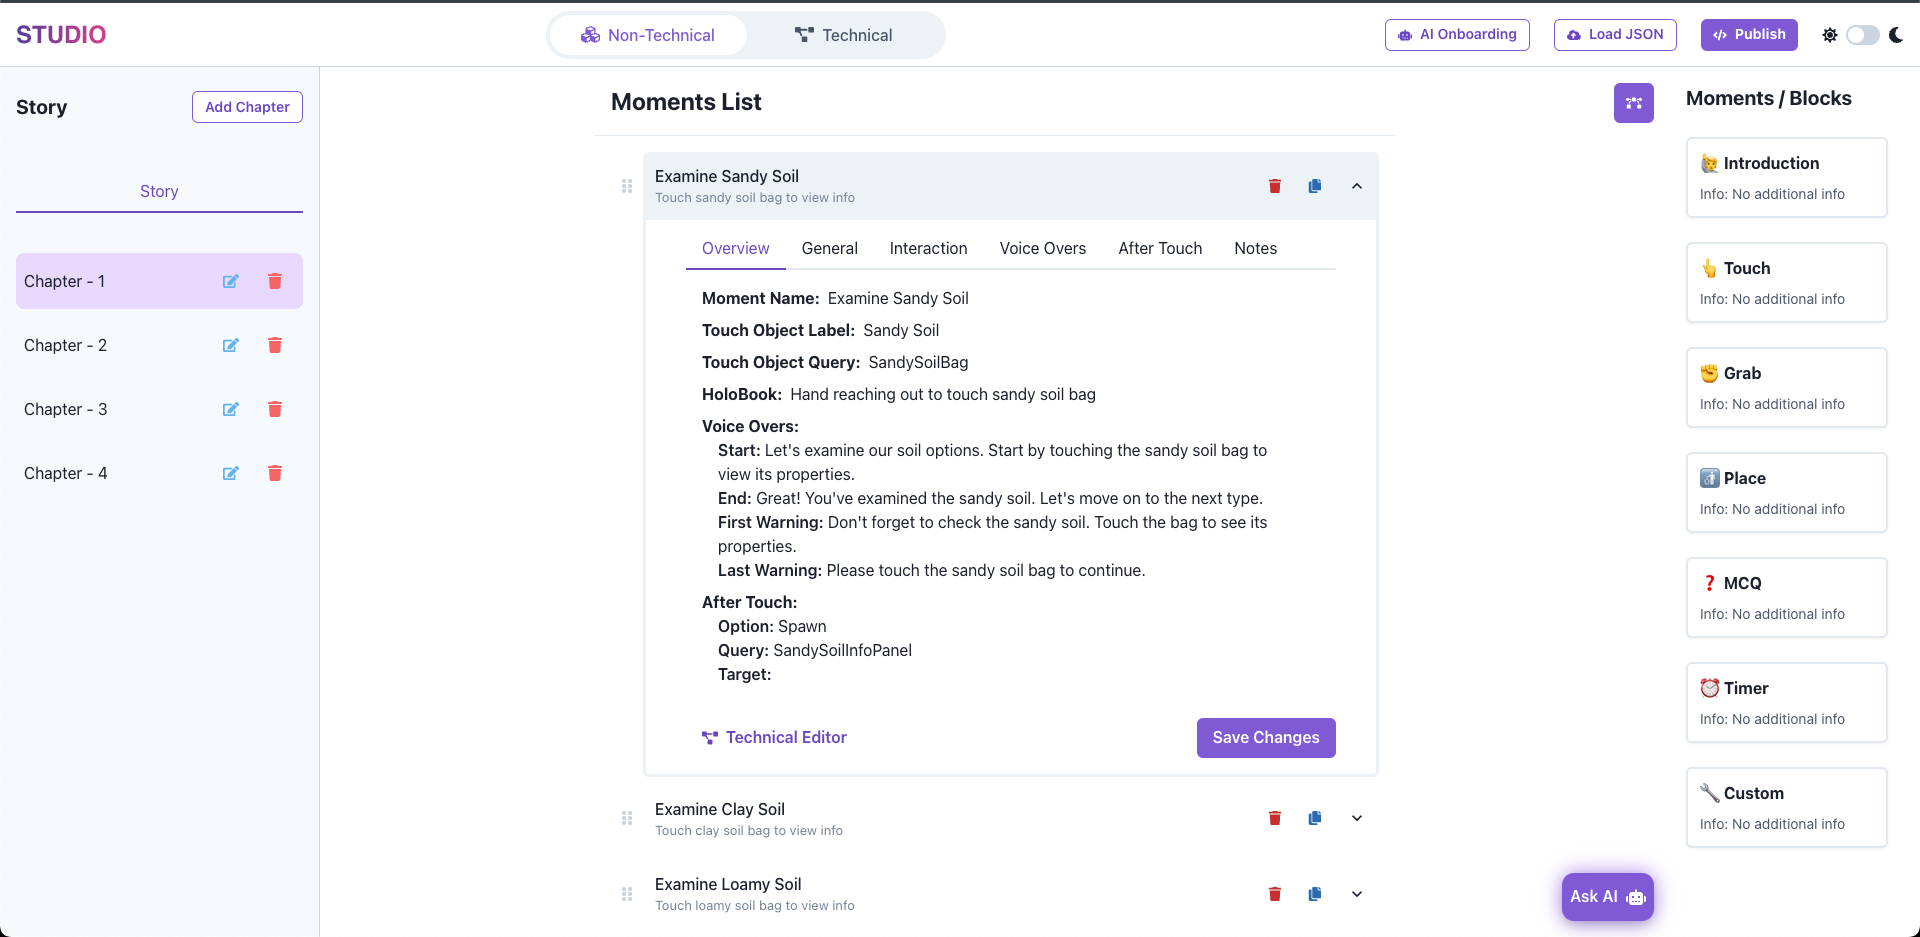 Current editing story features you can do right now
* Rearrange Moments,
* Duplicate them
* Edit content like - VoiceOvers - Touch Object, and Queries.
After you are happy with the story and done making basic changes.
Click on Publish > Download JSON
Your changes will now be availabel in Unity
***
Current editing story features you can do right now
* Rearrange Moments,
* Duplicate them
* Edit content like - VoiceOvers - Touch Object, and Queries.
After you are happy with the story and done making basic changes.
Click on Publish > Download JSON
Your changes will now be availabel in Unity
***