> ## Documentation Index
> Fetch the complete documentation index at: https://docs-vrsebuilder.autovrse.app/llms.txt
> Use this file to discover all available pages before exploring further.
# Working with the Unity SDK
> A guide on how to build an AI generated story in the Unity SDK
***
To start building in Unity, you would need to login on the interface just like you logged in on Studio, you can read more about it in the documentation for [Cloning your project in Unity](/unity-sdk/project-config-files)
You should have already created your story on Studio and published it as mentioned in the doc [Build your story with AI Chat](/studio/build-story-with-ai)
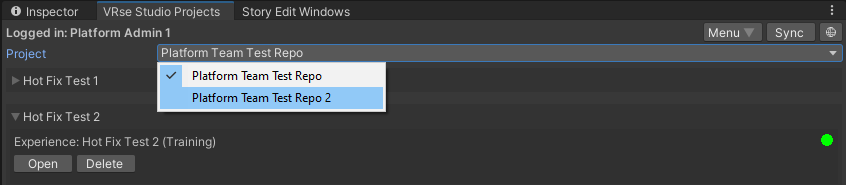
### Selecting Your Project
1. In the **VRse Studio Projects** window, locate the **Project** dropdown menu
2. Select your desired project from the list
3. The dropdown displays all projects associated with your Creator ID
 ***
### Create your Workspace and Folder Structure
**Select Module**
1. In the **VRse Studio Projects** window, choose the module you want to work with
2. Click the **Create** button
***
### Create your Workspace and Folder Structure
**Select Module**
1. In the **VRse Studio Projects** window, choose the module you want to work with
2. Click the **Create** button
 **Handle Configuration Dialogs** during the creation process, two dialogs may appear:
* **Open Project Config**: Provides access to project configuration settings
* **No Art Scene Assigned**: Used for assigning visual scenes
**Handle Configuration Dialogs** during the creation process, two dialogs may appear:
* **Open Project Config**: Provides access to project configuration settings
* **No Art Scene Assigned**: Used for assigning visual scenes
 ### Configure Project
The Project Config window centralizes all project-specific settings and automatically applies them to Unity components.
### Configure Project
The Project Config window centralizes all project-specific settings and automatically applies them to Unity components.
 #### Login Access Settings
* **PulseAPI URL**: Backend API endpoint for your project
* **Login Method**: Authentication method (typically "DomainName")
#### Text-to-Speech (TTS) Settings
* **TTS Token (OpenAI Key)**: API key for OpenAI text-to-speech services
* Confirm auto-generated paths for `Project Resource TTS Folder Path` and `Available File Path For TTS`
#### Photon App Settings
* **App Id Fusion**: Application ID for Photon Fusion multiplayer services
* **App Id Voice**: Application ID for Photon Voice communication services
* **Fixed Region** (Optional): Preferred server region for network optimization
#### Unity Project Settings
* **Company Name**: Publisher/developer name for Unity build
* **Product Name**: Application name
* **Package Naming Method**: Choose "Auto-generate" or "Custom"
#### Complete Setup
1. After configuring all sections individually, click the large green **Save and Apply All Settings** button
2. This master control saves all settings and applies them to respective Unity components
3. Ensures complete and consistent project setup
#### Login Access Settings
* **PulseAPI URL**: Backend API endpoint for your project
* **Login Method**: Authentication method (typically "DomainName")
#### Text-to-Speech (TTS) Settings
* **TTS Token (OpenAI Key)**: API key for OpenAI text-to-speech services
* Confirm auto-generated paths for `Project Resource TTS Folder Path` and `Available File Path For TTS`
#### Photon App Settings
* **App Id Fusion**: Application ID for Photon Fusion multiplayer services
* **App Id Voice**: Application ID for Photon Voice communication services
* **Fixed Region** (Optional): Preferred server region for network optimization
#### Unity Project Settings
* **Company Name**: Publisher/developer name for Unity build
* **Product Name**: Application name
* **Package Naming Method**: Choose "Auto-generate" or "Custom"
#### Complete Setup
1. After configuring all sections individually, click the large green **Save and Apply All Settings** button
2. This master control saves all settings and applies them to respective Unity components
3. Ensures complete and consistent project setup
 ### Preview Story in Unity
Once the project setup is completed as above, we can now "**Open**" our module and preview the scene, it will start off as two empty scenes, one is a "Dev" scene and one is an "Art" scene
**Dev Scene** - This scene holds all important code and systems that make the VR application run, the systems here can read the AI generated story from Studio. This scene is also meant to hold all the interactables assets of the story, the kind which will be interacted by the user.
**Art Scene** - This scene is meant to hold the static environment assets that are part of your experience, typically your art teams will have an environment which is light baked, this scene is to provide them with a separate space to work and experiment in
### Preview Story in Unity
Once the project setup is completed as above, we can now "**Open**" our module and preview the scene, it will start off as two empty scenes, one is a "Dev" scene and one is an "Art" scene
**Dev Scene** - This scene holds all important code and systems that make the VR application run, the systems here can read the AI generated story from Studio. This scene is also meant to hold all the interactables assets of the story, the kind which will be interacted by the user.
**Art Scene** - This scene is meant to hold the static environment assets that are part of your experience, typically your art teams will have an environment which is light baked, this scene is to provide them with a separate space to work and experiment in
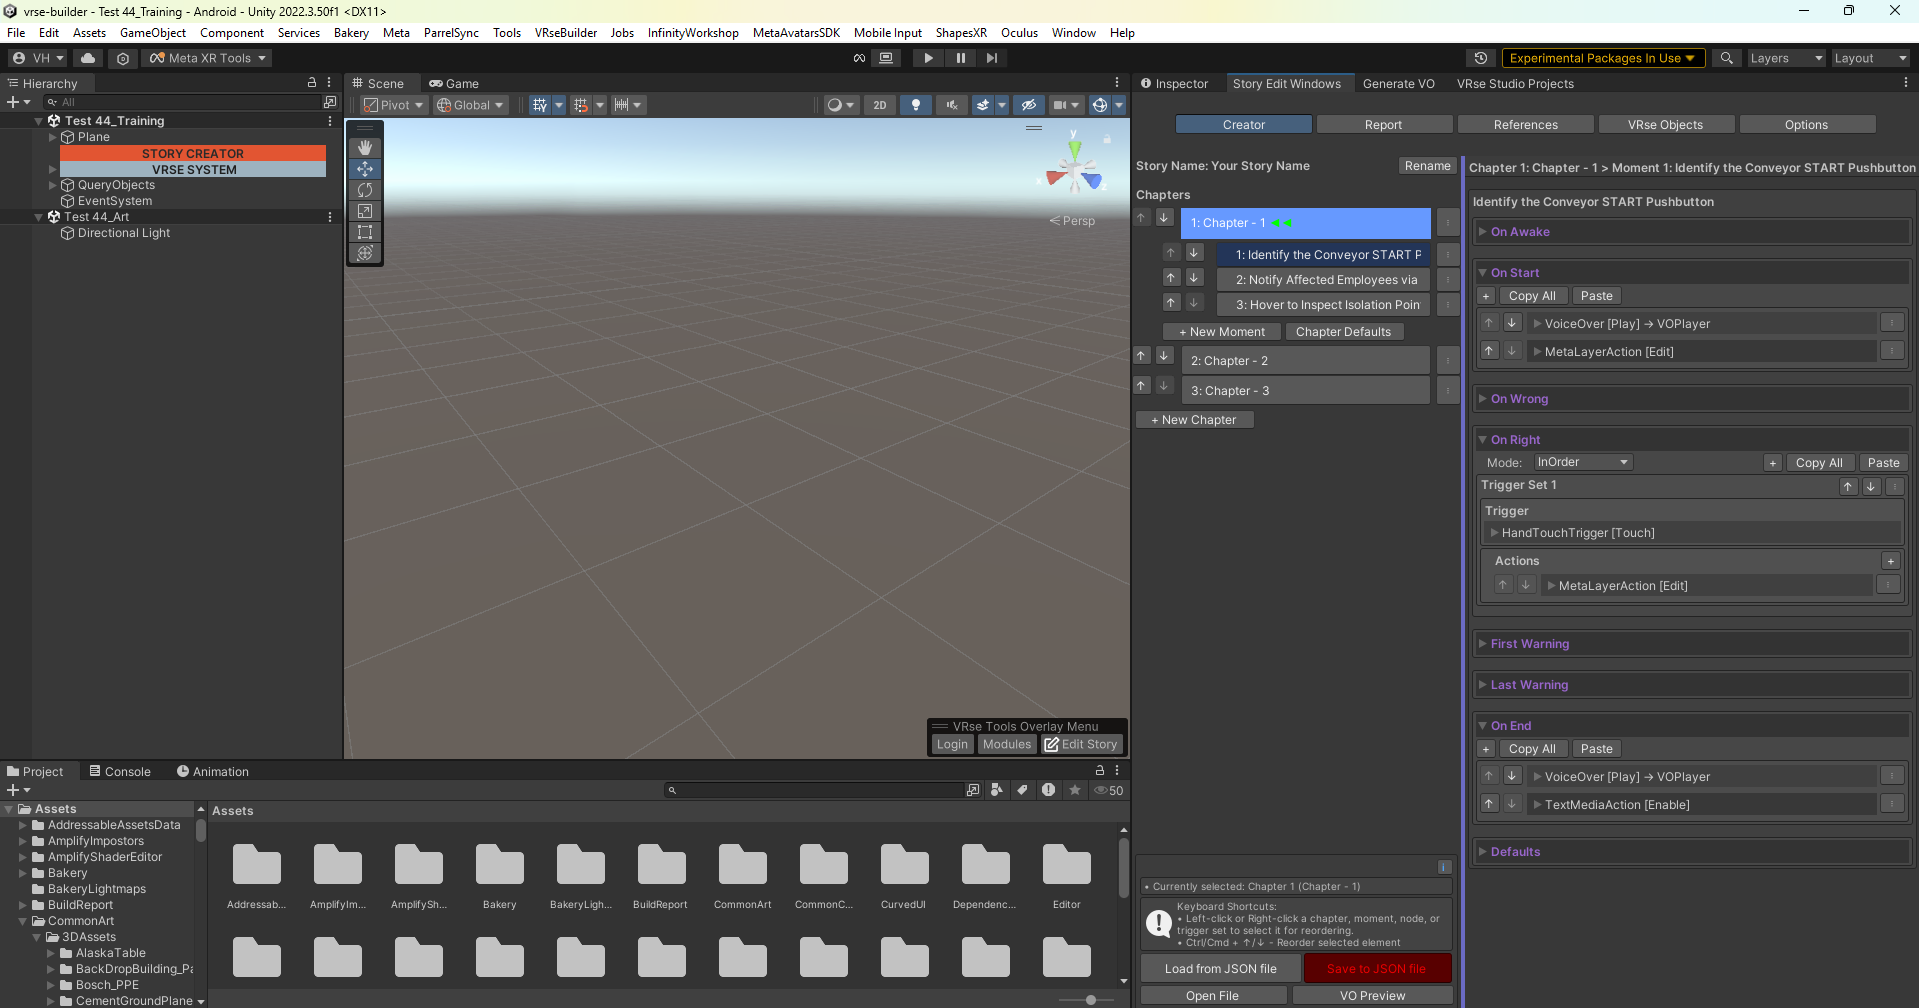 A window called "Story Edit Windows" will open up, if it doesn't by default you can open it from the Overlay menu on the 'Scene' Window.\
This window will have a very familiar view which breaks down the story in Chapters and Moments, and you can click each moment to see further details on what is happening in the moment similar to [Graph View](/studio/graph-view)
So far, we have a high level story, a machine readable structure for it, our Unity project and folder structure setup done, now we can truly start working on the 3D aspects of the same.
A window called "Story Edit Windows" will open up, if it doesn't by default you can open it from the Overlay menu on the 'Scene' Window.\
This window will have a very familiar view which breaks down the story in Chapters and Moments, and you can click each moment to see further details on what is happening in the moment similar to [Graph View](/studio/graph-view)
So far, we have a high level story, a machine readable structure for it, our Unity project and folder structure setup done, now we can truly start working on the 3D aspects of the same.
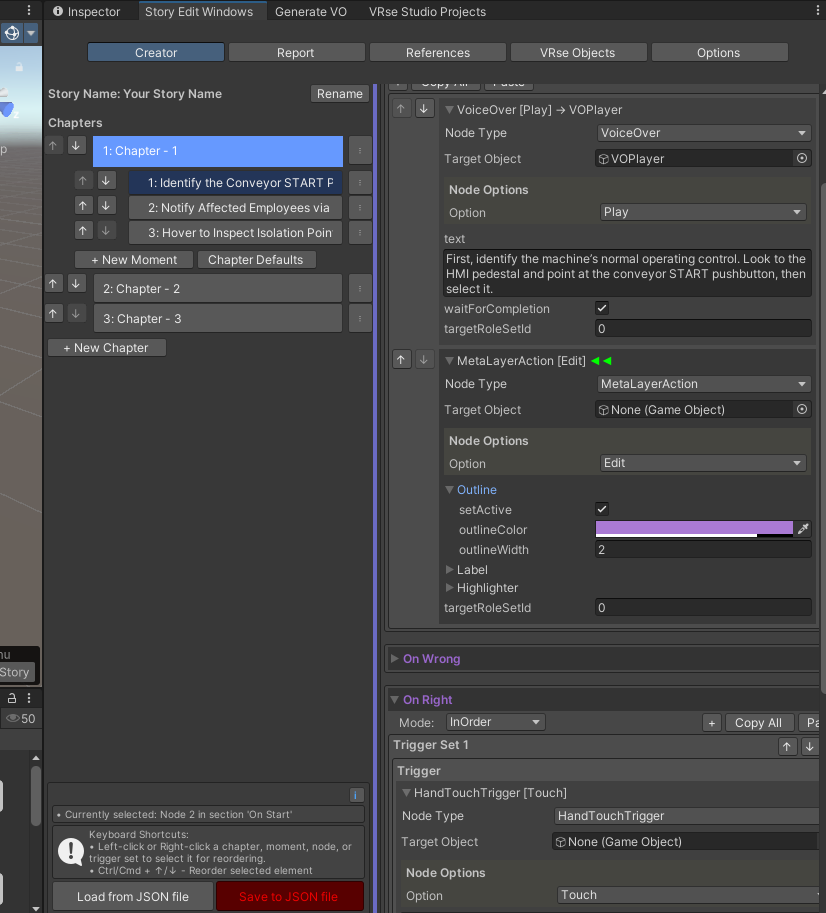 As you can see in the image above, Chapter 1 Moment 1 of the story, starts with a [VoiceOver](/unity-sdk/actions#voiceover-action), then a [MetaLayerAction](/unity-sdk/actions#metalayeraction) which is enabling outline for an object, and the "OnRight" contains a [HandTouchTrigger](/unity-sdk/triggers#handtouchtrigger), essentially saying the "Pass" condition for this step is to touch an object with your Hand.
However, there are no 'Target Object' assigned in any action or trigger in the same, and we have no 3D objects in the scene. We gotta do that next!
### Adding 3D Objects to the Scene
There are two ways we can proceed with this, either we add our own 3d models or use the VRse Builder DAM and import some models
**Add your own 3D Models** - This works the regular way, create a nice folder to save all your assets and drag and drop them into Unity into that folder, how you would do for any other Unity project, Unity will process your objects, create materials and texture files for the same and get a prefab ready for use on the scene.
Next, go ahead and drag and drop this model onto your **"Dev Scene"**
**Add from Infinity Workshop (VRseDAM)** - You can also use your 3D models uploaded on Infinity Workshop at this stage, simply drag and drop the models from the Interface onto your **"Dev Scene"**
If you are not aware of how Infinity workshop works, read more about it [here](/workshop/upload-master-tool)
### Make your Objects VRse Compatible
To make any object come to life with logic and scripting, we need to add components to it, you might be familiar with this process if you have used Unity before, we need to do the same for VRse Buidler as well, thankfully there is tooling to help with the same
Simple go to "VRse Objects" tab of "Story Edit Window" and you will see an interface like below
As you can see in the image above, Chapter 1 Moment 1 of the story, starts with a [VoiceOver](/unity-sdk/actions#voiceover-action), then a [MetaLayerAction](/unity-sdk/actions#metalayeraction) which is enabling outline for an object, and the "OnRight" contains a [HandTouchTrigger](/unity-sdk/triggers#handtouchtrigger), essentially saying the "Pass" condition for this step is to touch an object with your Hand.
However, there are no 'Target Object' assigned in any action or trigger in the same, and we have no 3D objects in the scene. We gotta do that next!
### Adding 3D Objects to the Scene
There are two ways we can proceed with this, either we add our own 3d models or use the VRse Builder DAM and import some models
**Add your own 3D Models** - This works the regular way, create a nice folder to save all your assets and drag and drop them into Unity into that folder, how you would do for any other Unity project, Unity will process your objects, create materials and texture files for the same and get a prefab ready for use on the scene.
Next, go ahead and drag and drop this model onto your **"Dev Scene"**
**Add from Infinity Workshop (VRseDAM)** - You can also use your 3D models uploaded on Infinity Workshop at this stage, simply drag and drop the models from the Interface onto your **"Dev Scene"**
If you are not aware of how Infinity workshop works, read more about it [here](/workshop/upload-master-tool)
### Make your Objects VRse Compatible
To make any object come to life with logic and scripting, we need to add components to it, you might be familiar with this process if you have used Unity before, we need to do the same for VRse Buidler as well, thankfully there is tooling to help with the same
Simple go to "VRse Objects" tab of "Story Edit Window" and you will see an interface like below
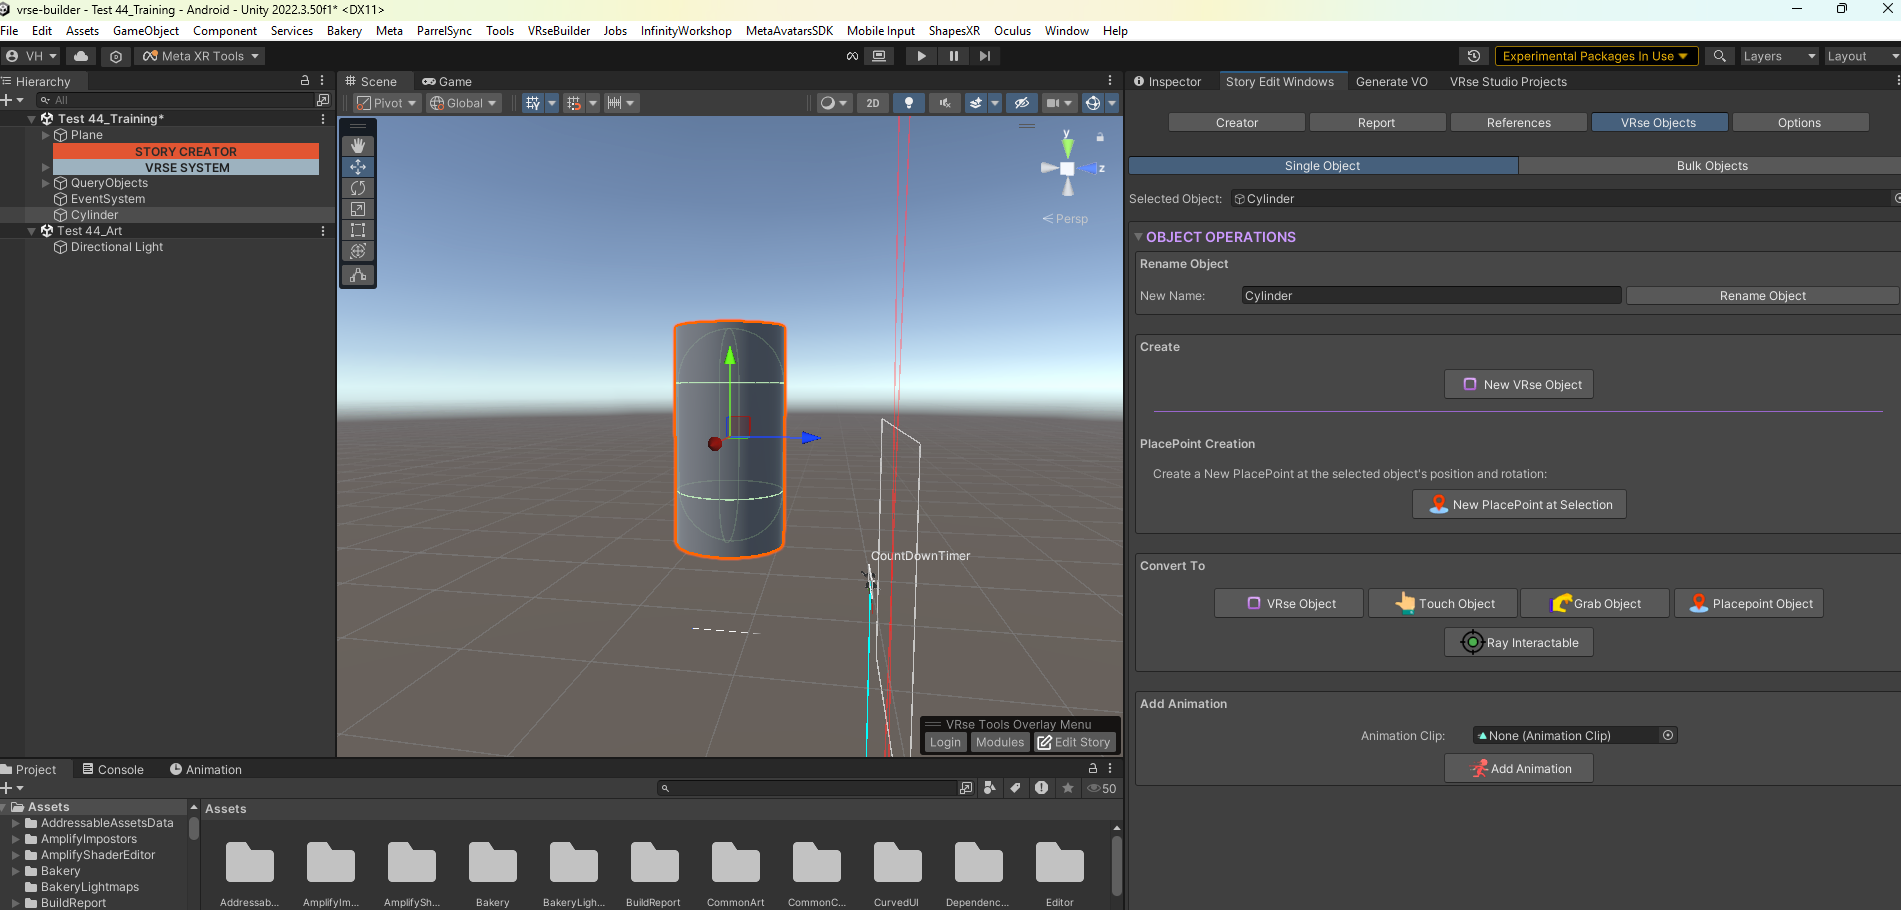 In the image, i have created a cylinder mesh, it is a Unity Primitive, in the window i am presented with a few options in the "Object Operations" sub-tab
* **Create VRse Object** - Create a basic GameObject capable of being tracked by the Story
* **PlacePoint Creation** - Interactive creation of placepoint
* Convert To
* **VRse Object** - Create a basic GameObject capable of being tracked by the Story
* **Touch Object** - An object that can touched by user using and detected using the [HandTouchTrigger](/unity-sdk/triggers#handtouchtrigger)
* **Grab Object** - An object that can be grabbed by user and detected using the [GrabbableTrigger](/unity-sdk/triggers#grabbabletrigger)
* **Placepoint Object** - Create a placepoint object at the position of the current object, grabbable objects can be placed here and detected using [PlacePointTrigger](/unity-sdk/triggers#placepointtrigger)
* **Ray Interactable** - An object that can be detected using the hand ray-pointer by user
* **Add Animation** - This adds the necessary components for Animation to be playable using the [AnimationAction](/unity-sdk/actions#animationaction)
### Assign References
Once you have the right type of VRse Objects you need created, simply assign them to the TargetObject field in the Story Creator
In the image, i have created a cylinder mesh, it is a Unity Primitive, in the window i am presented with a few options in the "Object Operations" sub-tab
* **Create VRse Object** - Create a basic GameObject capable of being tracked by the Story
* **PlacePoint Creation** - Interactive creation of placepoint
* Convert To
* **VRse Object** - Create a basic GameObject capable of being tracked by the Story
* **Touch Object** - An object that can touched by user using and detected using the [HandTouchTrigger](/unity-sdk/triggers#handtouchtrigger)
* **Grab Object** - An object that can be grabbed by user and detected using the [GrabbableTrigger](/unity-sdk/triggers#grabbabletrigger)
* **Placepoint Object** - Create a placepoint object at the position of the current object, grabbable objects can be placed here and detected using [PlacePointTrigger](/unity-sdk/triggers#placepointtrigger)
* **Ray Interactable** - An object that can be detected using the hand ray-pointer by user
* **Add Animation** - This adds the necessary components for Animation to be playable using the [AnimationAction](/unity-sdk/actions#animationaction)
### Assign References
Once you have the right type of VRse Objects you need created, simply assign them to the TargetObject field in the Story Creator
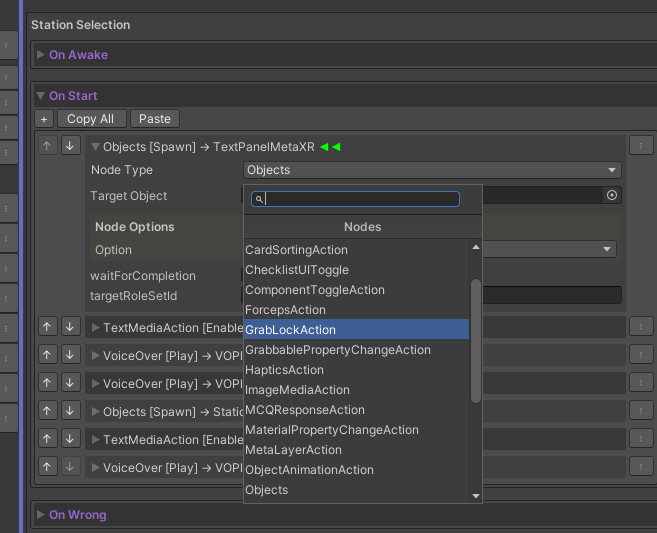
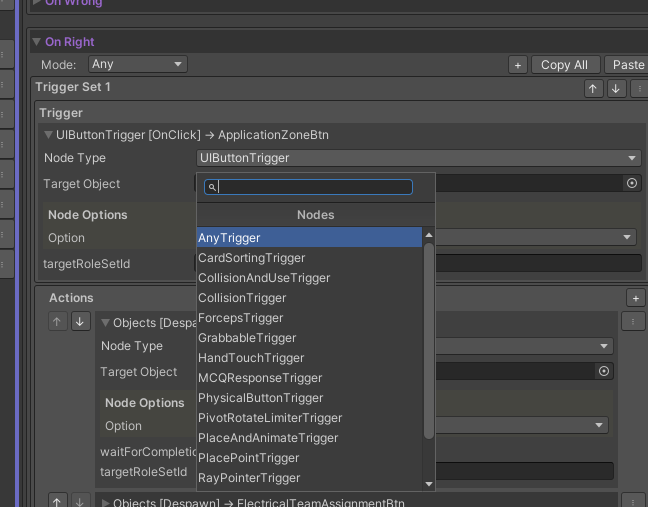
 **Other Actions & Triggers**
Theres an entire array of Actions & Triggers, simply use the dropdown in the Story Creator and switch to a different action or trigger that fits better in your story
**Other Actions & Triggers**
Theres an entire array of Actions & Triggers, simply use the dropdown in the Story Creator and switch to a different action or trigger that fits better in your story
 ### Generate VoiceOvers
After you have made edits to your story, there is still one step that you need to do before you can play, the experience would still work at this point but there will be no voice overs!
To generate the VoiceOvers using the TTS services, click the "VO Preview" button below the save button and you will see a window like below
### Generate VoiceOvers
After you have made edits to your story, there is still one step that you need to do before you can play, the experience would still work at this point but there will be no voice overs!
To generate the VoiceOvers using the TTS services, click the "VO Preview" button below the save button and you will see a window like below
 Simply chose the type of voice you want and click "Generate VoiceOvers", this will take a few minutes depending on how many voice overs you have, once done go to the next step.
### Play
Just hit play!
### VRseMachines Window (Early Access)
This is a collection of prefabs of our library of interactables, each interactable in this list can be controleld by actions and triggers
**Access this window from VRseBuilder > Building Blocks**
Simply chose the type of voice you want and click "Generate VoiceOvers", this will take a few minutes depending on how many voice overs you have, once done go to the next step.
### Play
Just hit play!
### VRseMachines Window (Early Access)
This is a collection of prefabs of our library of interactables, each interactable in this list can be controleld by actions and triggers
**Access this window from VRseBuilder > Building Blocks**
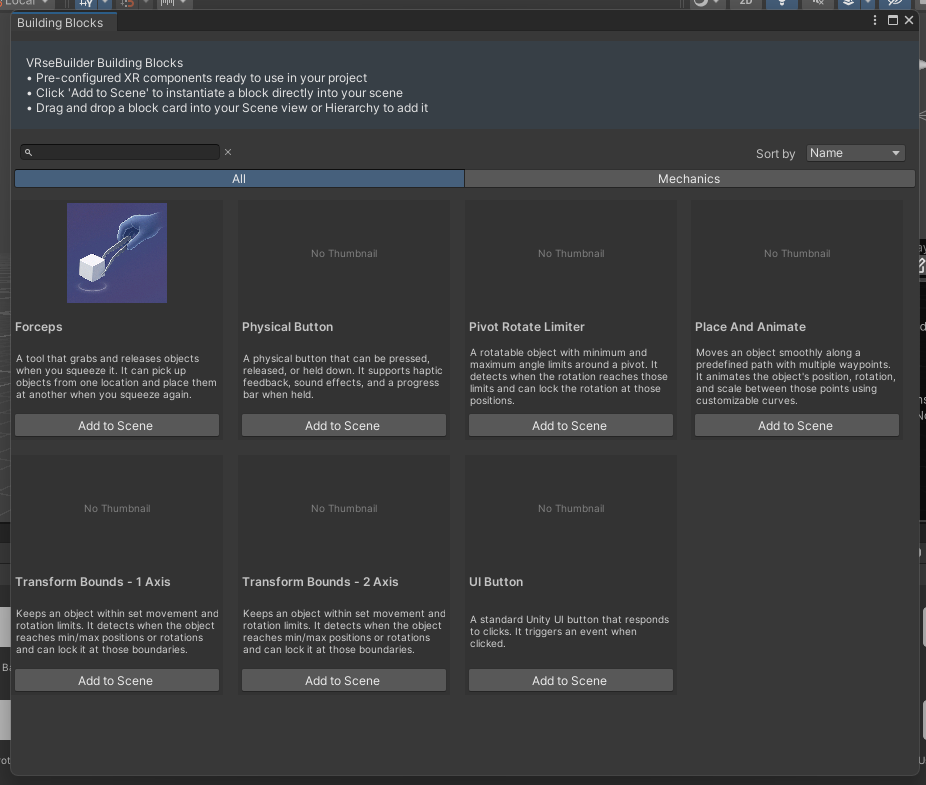 In the screenshot above you can see a Forceps interactable, adding the same to your scene will give you a VRse Object that can be used in your story, you could change the meshes of the default object as well
### Sync story with Studio
Synchronize story files between your Unity local environment and Studio using the sync functionality. Go to VRse Studio Projects window and hit "Sync"
In the screenshot above you can see a Forceps interactable, adding the same to your scene will give you a VRse Object that can be used in your story, you could change the meshes of the default object as well
### Sync story with Studio
Synchronize story files between your Unity local environment and Studio using the sync functionality. Go to VRse Studio Projects window and hit "Sync"
 **Sync Status Indicators:**
* 🟢 **Green**: Local and cloud versions are in sync
* 🟡 **Yellow**: Out of sync - local and cloud versions differ
* 🔴 **Red**: Error occurred during sync status check
* ⚪ **Gray**: Currently checking sync status
* **"Get Story"**: Downloads the latest story version from Studio to your local environment
* Use when: Status is yellow (🟡) and you want the cloud version
* Use when: Starting new development work
* Use when: Collaborating with others who have made changes
**Sync Status Indicators:**
* 🟢 **Green**: Local and cloud versions are in sync
* 🟡 **Yellow**: Out of sync - local and cloud versions differ
* 🔴 **Red**: Error occurred during sync status check
* ⚪ **Gray**: Currently checking sync status
* **"Get Story"**: Downloads the latest story version from Studio to your local environment
* Use when: Status is yellow (🟡) and you want the cloud version
* Use when: Starting new development work
* Use when: Collaborating with others who have made changes
 * **"Push Story"**: Uploads your local story version to Studio
* Use when: Status is yellow (🟡) and you want to upload your local changes
* Use when: You have completed local modifications
* Use when: You want to share your work with collaborators
* **"Push Story"**: Uploads your local story version to Studio
* Use when: Status is yellow (🟡) and you want to upload your local changes
* Use when: You have completed local modifications
* Use when: You want to share your work with collaborators
